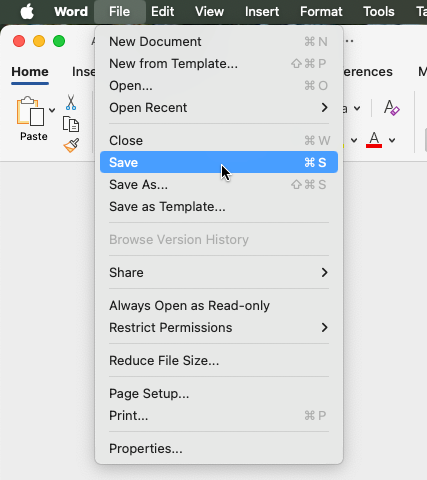
Downloading the Add-on
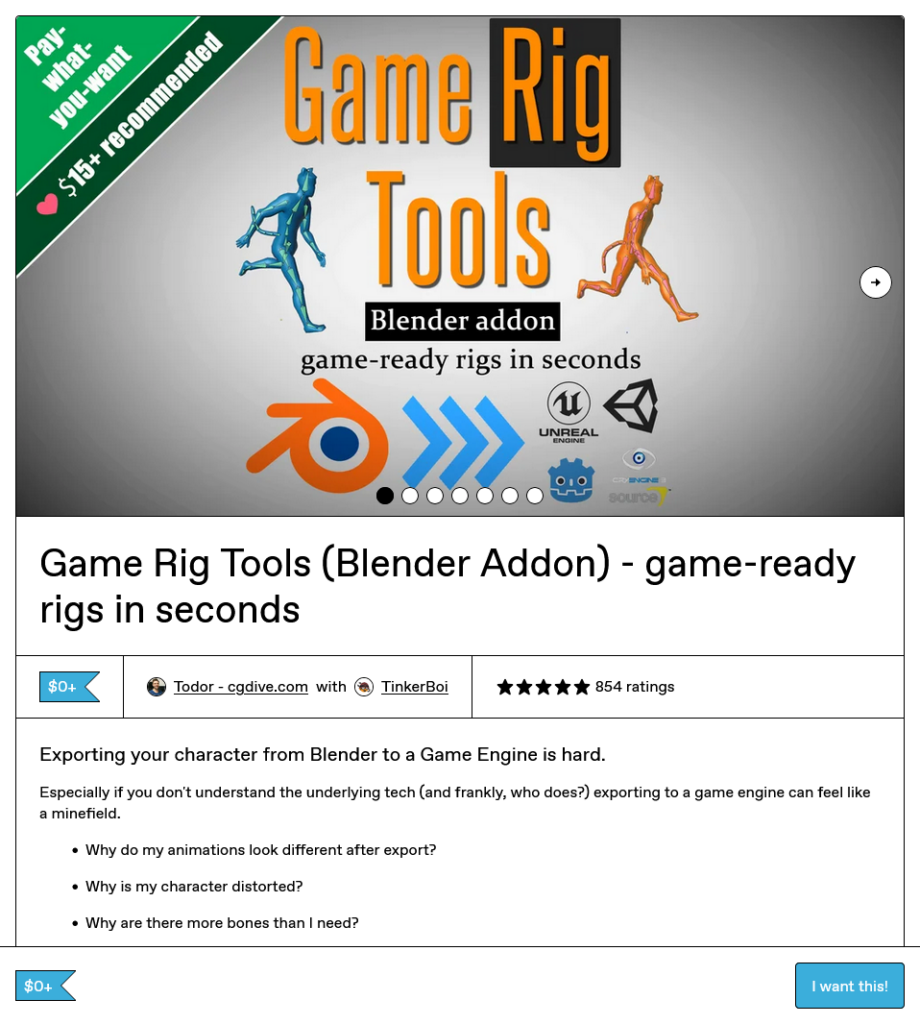
First we need to download our Rigging Add-on – go to https://toshicg.gumroad.com/l/game_rig_tools. Set your pay price as $0 (or more if you’re feeling generous) and press “I want this”. Provide your email address and press “Get” to receive the download link in your emails.
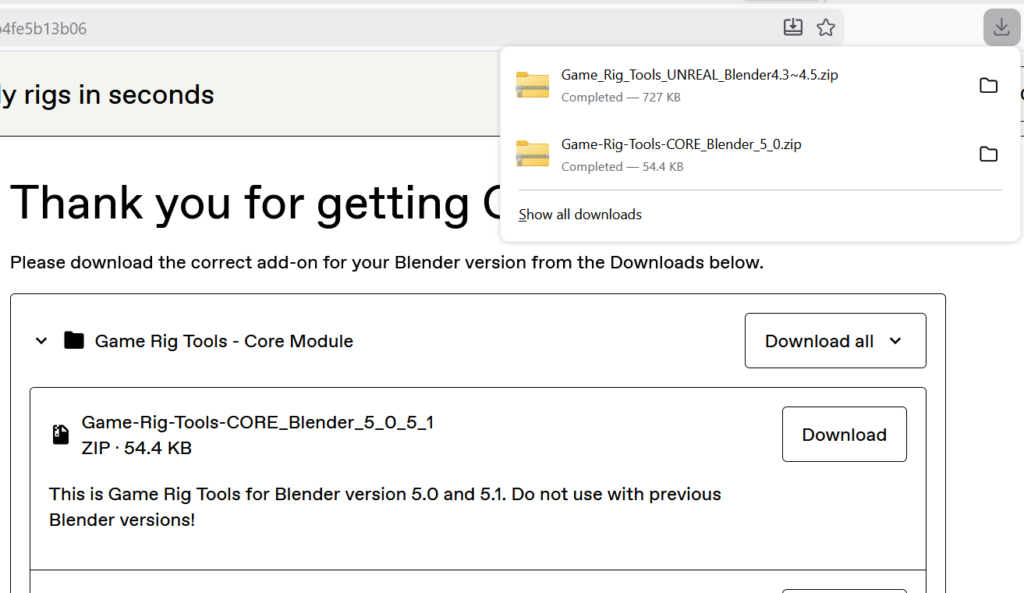
Download the Core and Unreal Modules matching your versions of Blender and Unreal Engine respectively.
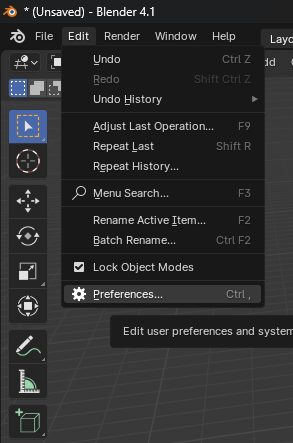
Installing the Add-on
In Blender, go to Edit > Preferences. Select the Add-ons tab on the left and select “Install” in the top right corner.
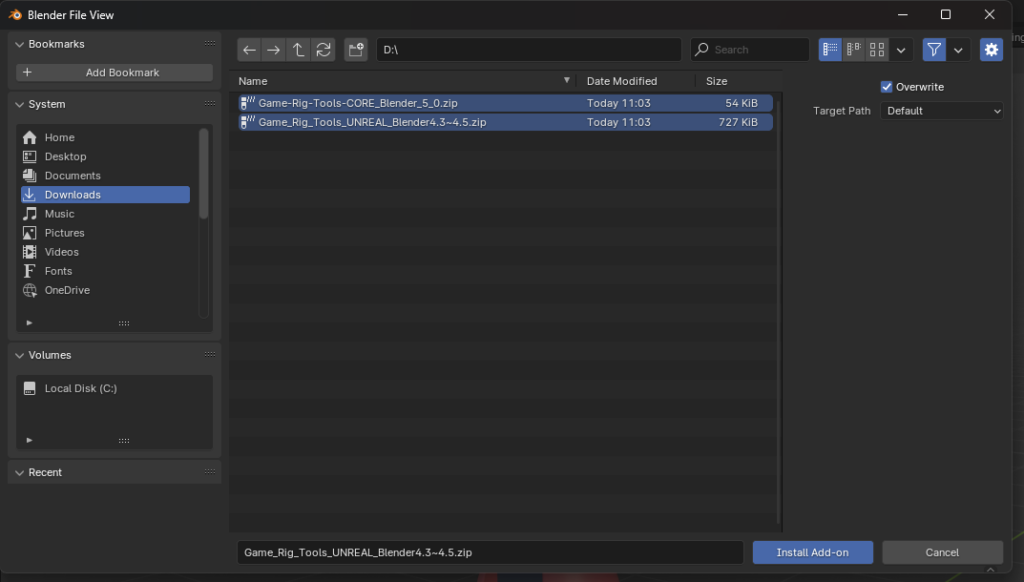
Select the two modules you just downloaded and press “Install Add-on”. These are likely in your Downloads folder. Ensure this add-on is enabled before leaving this menu.
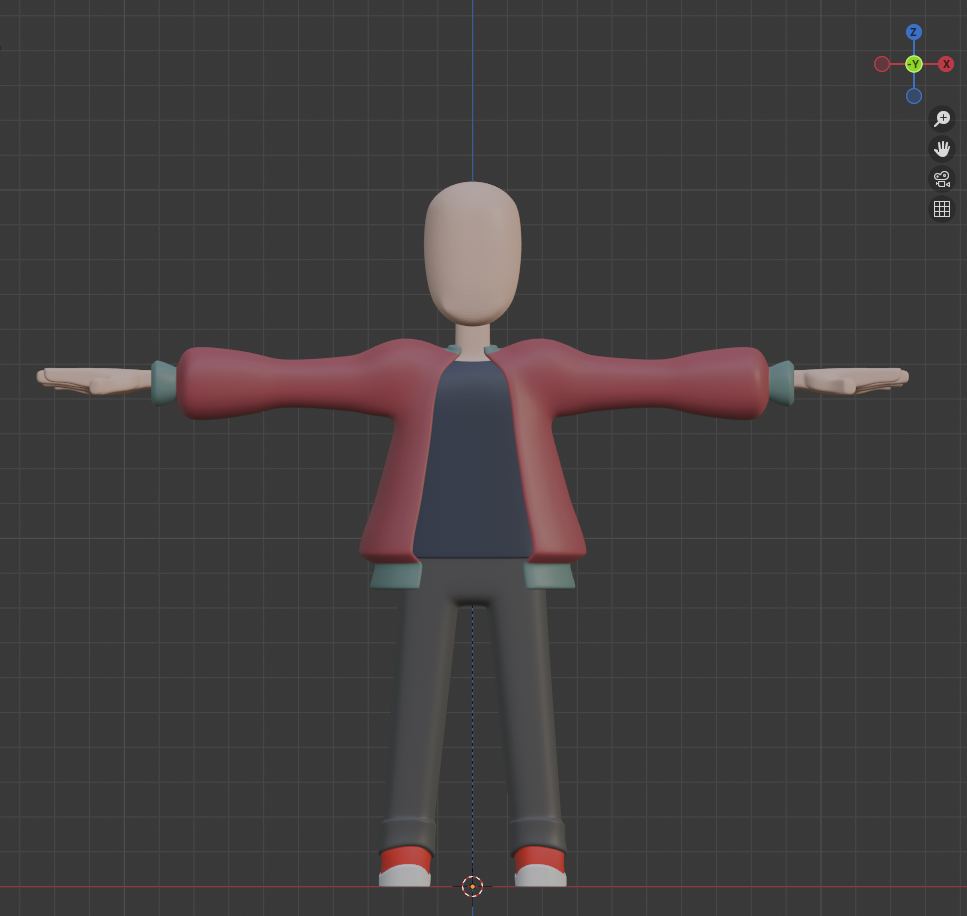
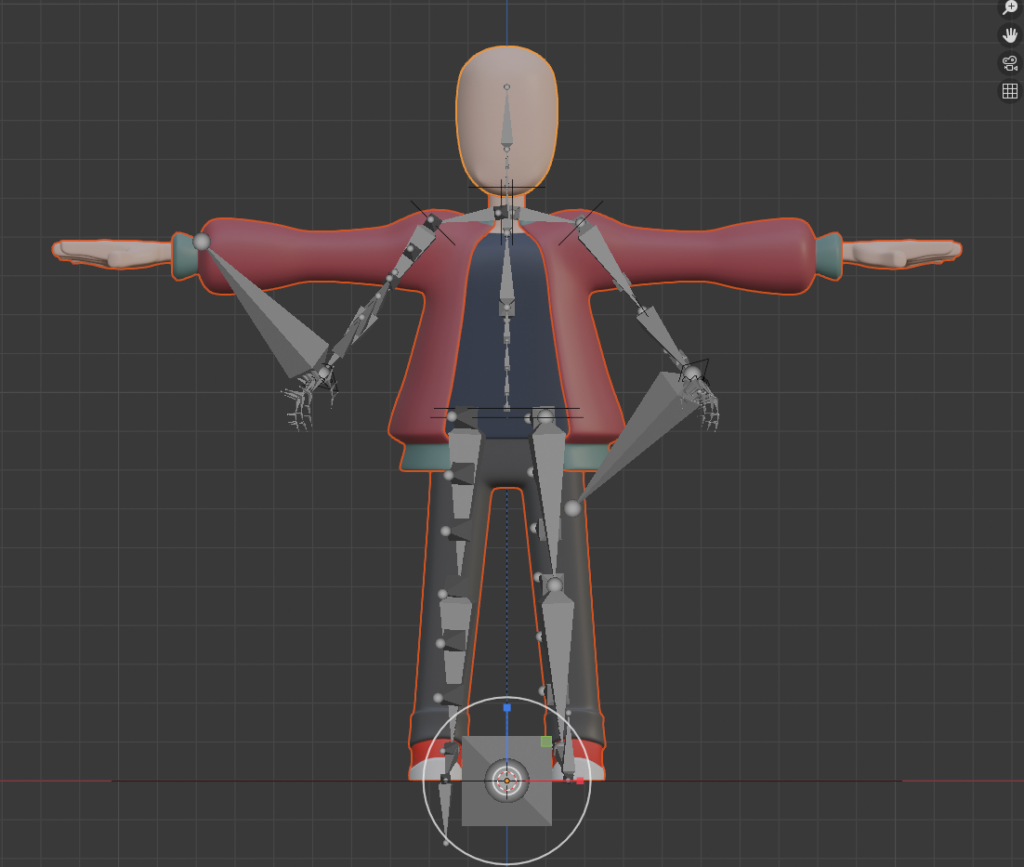
Before starting, ensure your model is perfectly centered and aligned on the grid as shown above.
Creating Rig
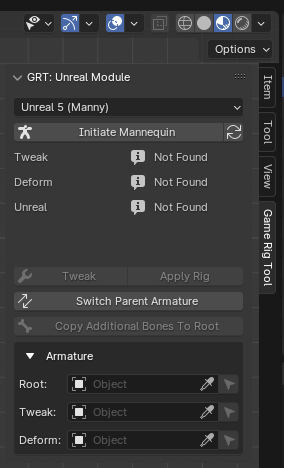
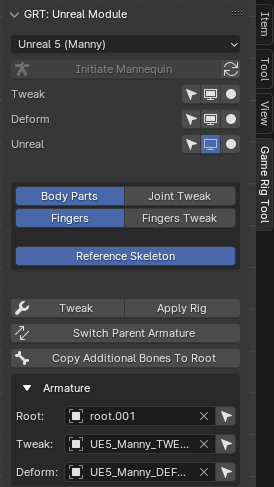
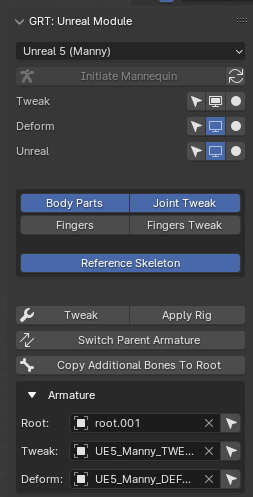
On the right side, open the “Game Rig Tool” panel. Ensure the correct rig is selected (“Manny” for Unreal Engine 5 or “Mannequin” for Unreal Engine 4) and press “Initiate Mannequin”. This creates the Unreal Engine default skeleton for our character.
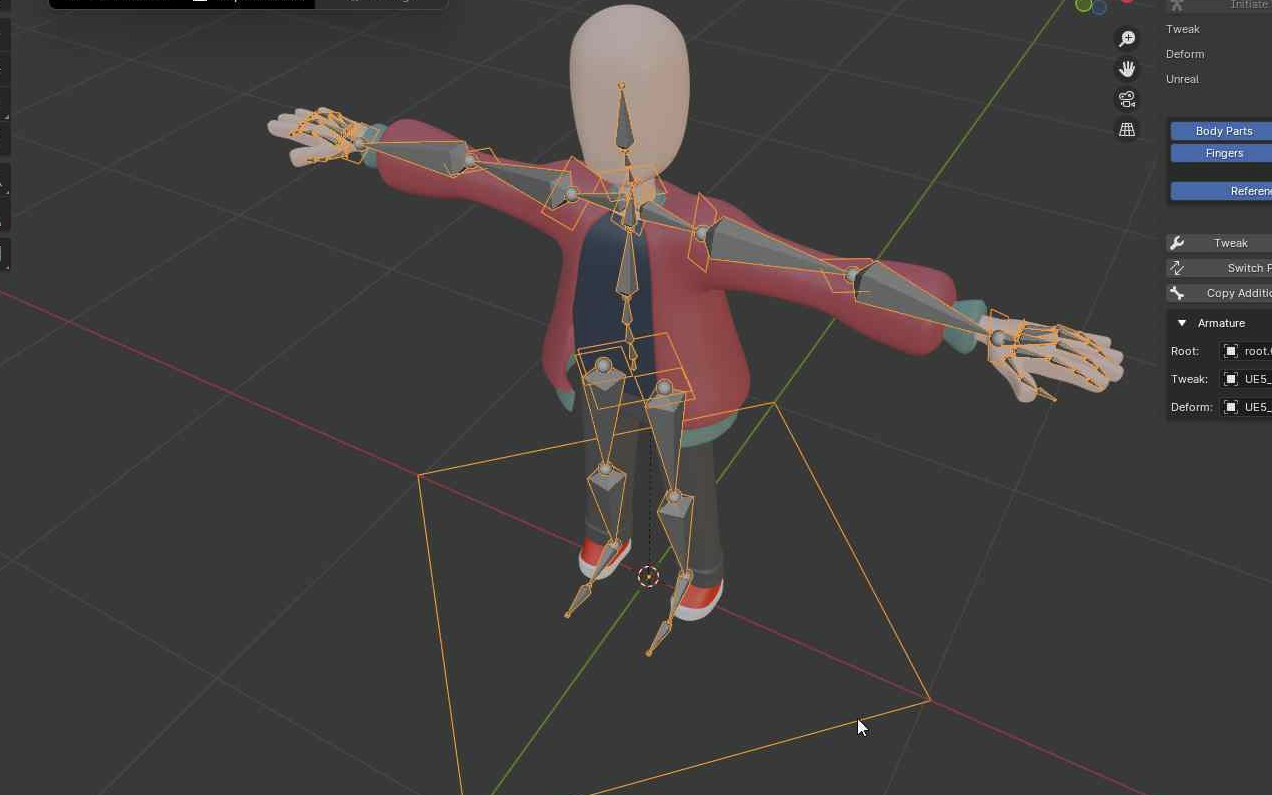
In object mode scale, move and rotate your character model to broadly overlap the skeleton. Your model probably will not align with the Skeletons proportions perfectly, so focus on aligning with the skeletons shoulder height correctly for now. Be careful to only to adjust the character model to match the skeleton, not the other way around.
Arranging Bones
Now we need to align our bones with the character model. Bore we start lets hide the Unreal skeleton in the Game Rig Tool panel by pressing the computer screen next to “Unreal”.
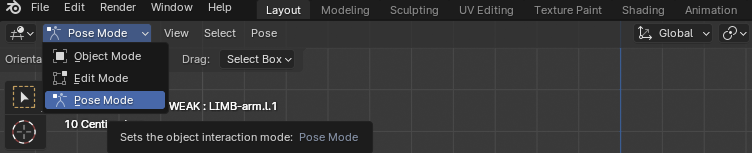
Select one of the controllers (the diamonds around the skeletons joints) and select “Pose Mode” from the top left drop down menu.
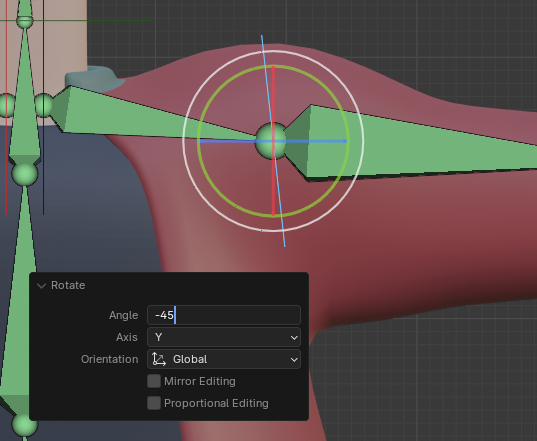
As we built our character model in a T pose, we need to adjust the skeletons position from it’s default A pose. Select the right shoulder controller (the blue diamond) and rotate by around -45 degrees on the Y axis. Note that the left side of the skeleton will mirror the changes we make on the right
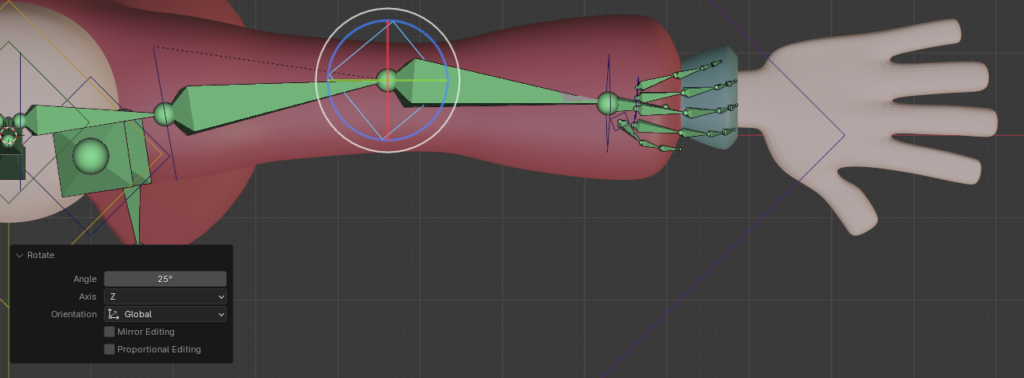

Continue to scale and rotate the arm into it’s general position using the controllers. Our character model probably doesn’t perfectly match the skeletons proportions, we will need to adjust these joint positions manually.
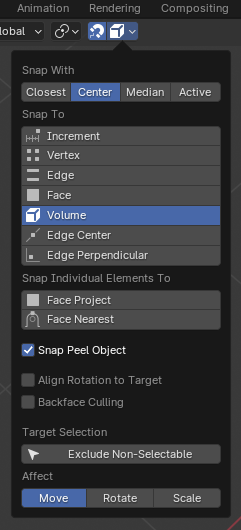
Before continuing, let’s turn on snap to volume and tick “Snap Peel Object”.
This will automatically place joints at center mass of the character model when we move them into position.
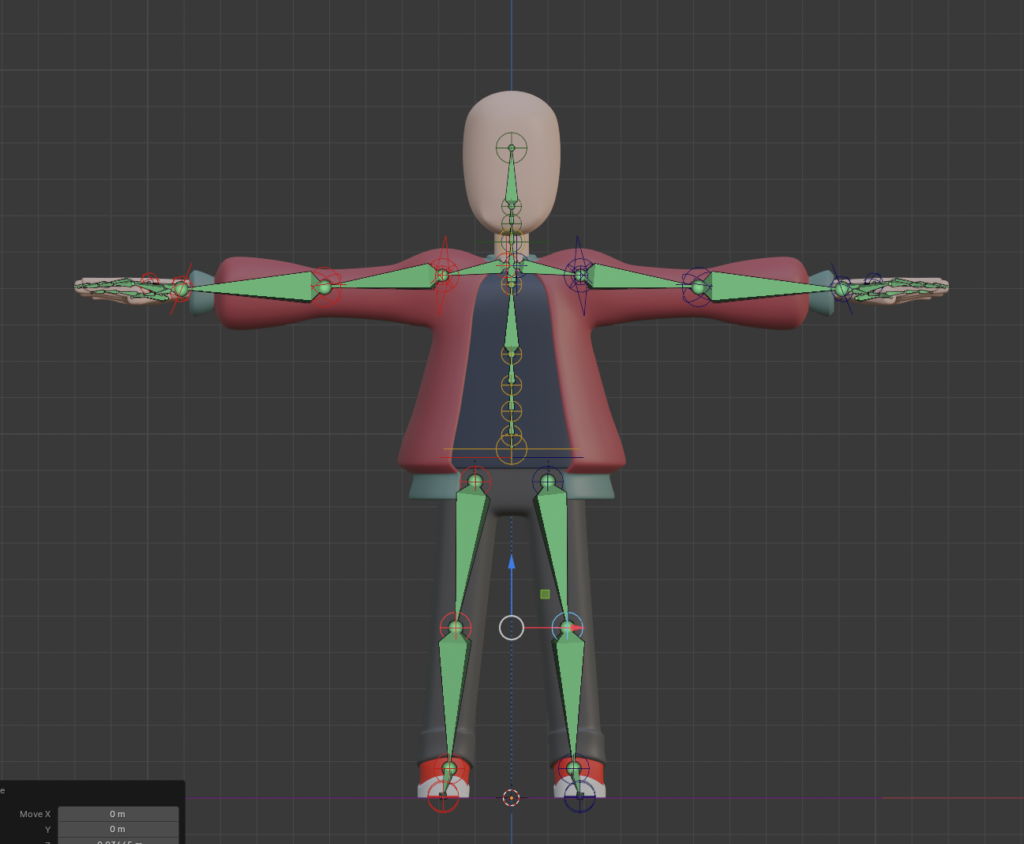
Let’s begin making fine adjustments. In the Game Rig Tool panel check that “Body Parts” and “Joint Tweak” are selected. Using the move tool, position each joint in the appropriate location. Be careful not to reorder the joints. We will work on the hands after this step.
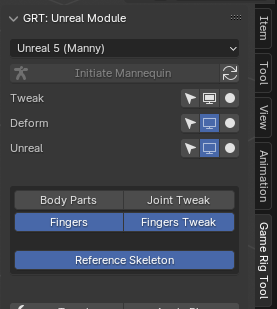
When the joints of main body is in position, move onto your characters hands. Back in the Game Rig Tool panel enable “Fingers” and “Finger Tweak” and disable “Body Parts” and “Joint Tweak”.

Zoom into on one of the hands to position the joints using the move tool. Be careful not to change the order of the fingers.
Setting up your Model for binding
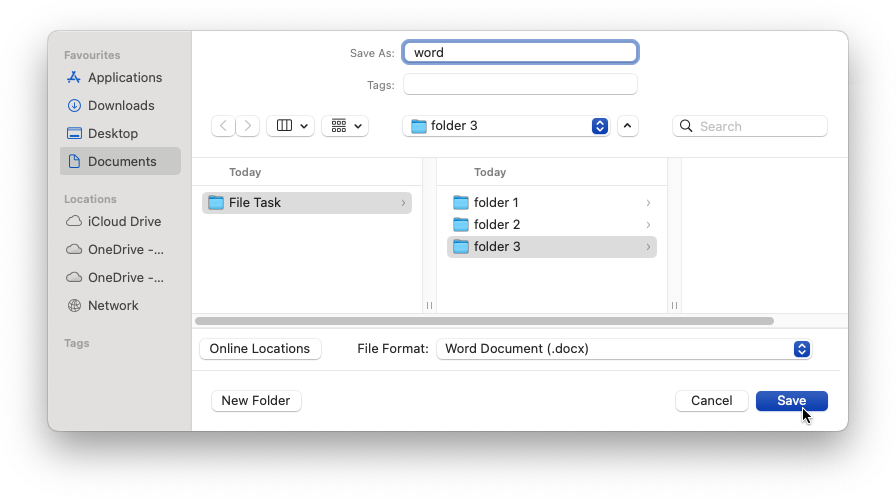
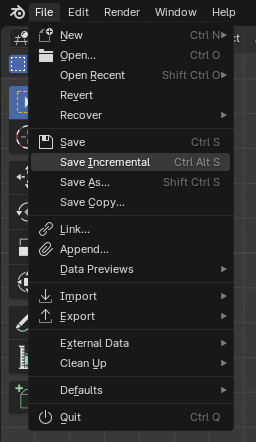
We are about to make some permanent changes to our character model, before starting with this step we are going to save a copy, this way we can return to our more editable model if needed. Before starting go to File > Save Incremental.
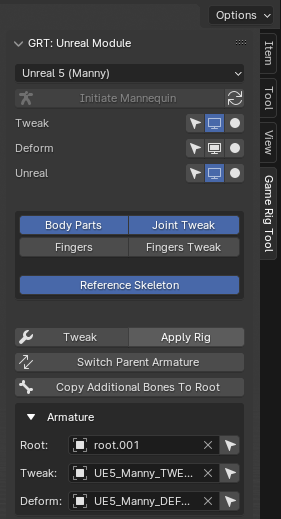
When you are happy with your bone placement press Apply Rig in the Game Rig Tool. This finalizes our mesh position. We can now hide the tweak Skeleton and focus on the deform skeleton.
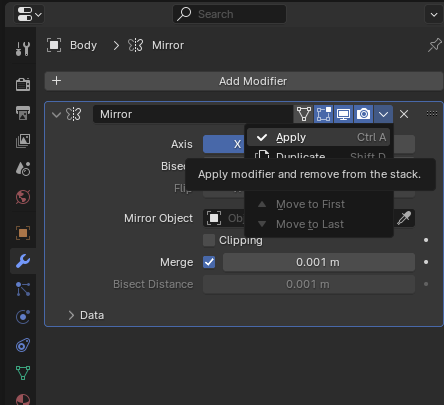
Go to the Modifiers panel on the right. Select each piece of your model individually and press the downwards pointing arrow next to the camera to select “Apply”. This permanently implements the mirror modifier we used for character modeling.
Binding Rig to Mesh
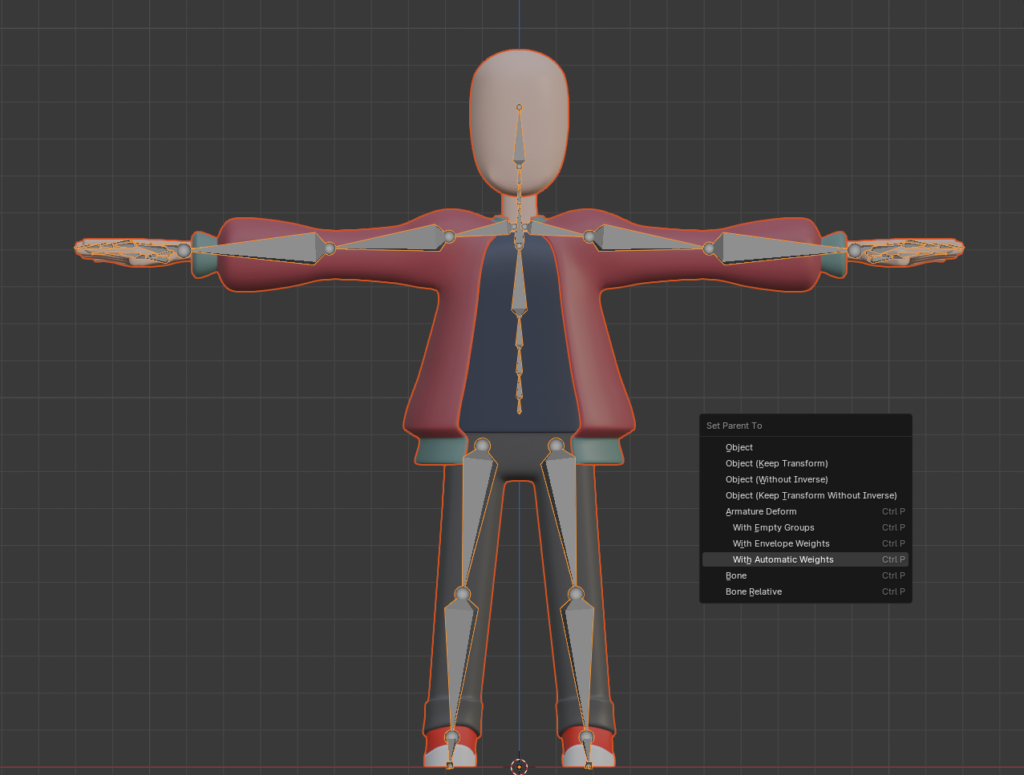
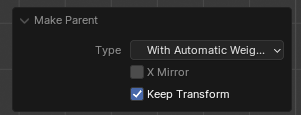
Shift-Select your model and then the deform skeleton. Press Ctrl+P and select “With Automatic Weights”. This will do an automatic binding of your mesh to the skeleton. If your character model is made up of several pieces binding each piece separately often produces better results.
If your character “disappears” tick “Keep Transform” in the bottom left corner. What’s actually happening is that the character is scaling out of the view-port.
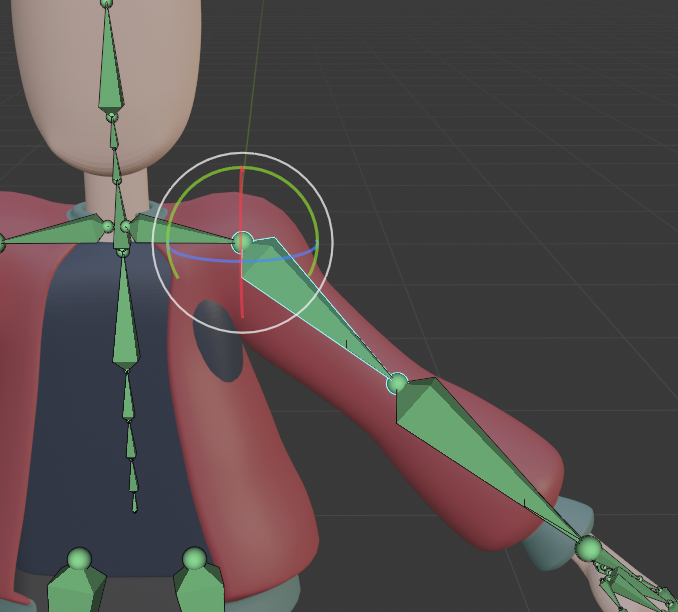
Select your deform skeleton and use the rotate tool to check your rigging. At this point you might notice some flaws in the rig including clipping and bad deformations. Automatic rigging is a great start, but to get great rigging we would need to do some weight painting.
Weight painting is a very complicated discipline outside of the scope of this unit, but feel free to do some independent study and attempt it on your own time.
Bind Character to Unreal Skeleton
Because Unreal Engine handles bones differently to Blender, we need to apply the binding of our deform skeleton to our Unreal skeleton.
Switch to object mode. In the Game Rig Tool Panel, Click “Switch Parent Armature”. While we are here, turn off display for the Tweak and deform skeletons and turn on the display for the Unreal skeleton.
Select the Unreal skeleton and enter pose mode. Rotate some bones to confirm your mesh is is now bound to the Unreal skeleton.

Exporting Your Rigged Mesh
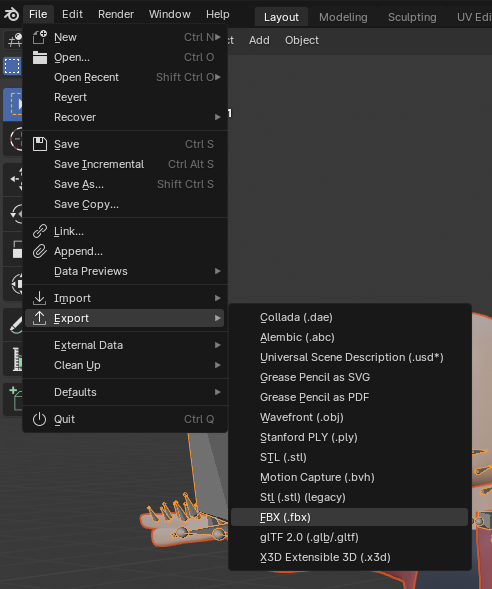
We are done! it’s time to export our character mesh to Unreal Engine. Shift-select the Unreal Skeleton and all pieces of our character mesh. Select File > Export > FBX.
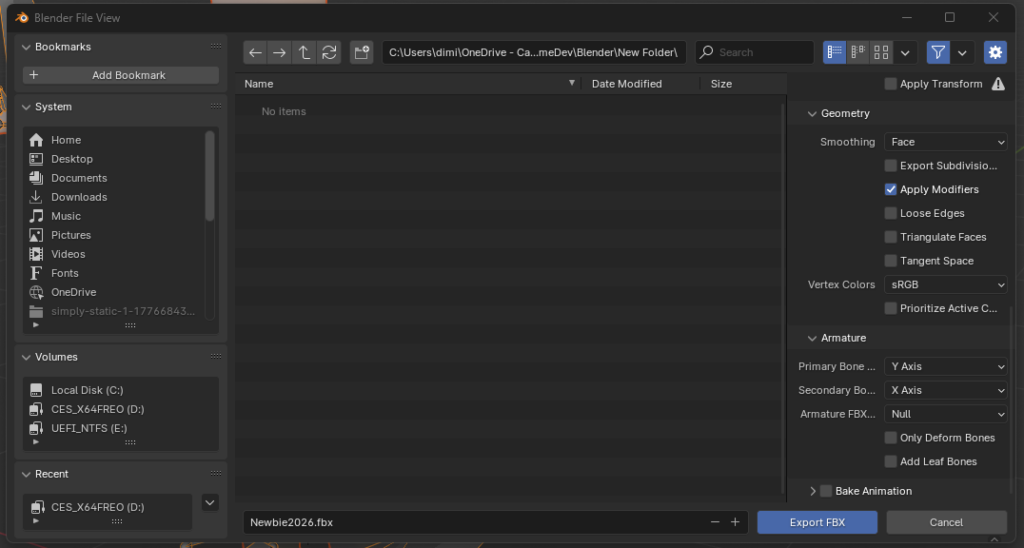
In your FBX export settings name your character and select the following options:
- In Include enable “Limit to Selected Objects”
- In Geometry set “Smoothing to Face”
- In Armature disable “Add Leaf Bones”
- Disable “Bake Animation”
Next lesson we will import our rigged mesh into Unreal Engine 5