This task aims to assess your understanding of cryptography concepts, and encryption techniques, creativity and problem-solving skills, and collaboration skills with your partner.
Your task is to create a cryptography puzzle that consists of at least 3 layers of security. Your puzzle should use a range of cryptography techniques including one of the cipher methods we learned in class.
How it will be Assessed
Your puzzle will be graded according to the following criteria:
Collaboration & contribution skills.
Creativity and complexity.
Understanding & implementation of Encryption techniques.
Clarity of instructions & hints
Presentation & peer engagement to the testing of others puzzles.
Follow the steps below carefully to complete the task.
Step 1: Research, inspiration and ideas.
Conduct research based on encryption methods we have covered in class, as well as additional ideas you may be able to use to help create your puzzle.
Record a list of your ideas on a Word Document.
Step 2: Make your puzzle.
Begin the process of creating your puzzle. Establish what will happen in each layer of security and encryption.
(Feel free to collect resources and materials or make your own in this stage.)
Begin making your clues, hints or steps required to complete your puzzle. Ensure these are presented in a way for someone to follow.
Step 3: Testing your puzzle.
Test your own puzzle to ensure it works. If there are any changes or amendments to be completed, ensure they are corrected before final submission and presentation.
Step 4: Presenting your puzzle.
Discuss the best way to present your puzzle to the group with me and gather any resources needed to do so.
You will have half a lesson to present your puzzle to the group as well as take part in the completion of other groups puzzles.
Example Puzzle Ideas:
Use the ideas below to help your get started:
Substitution Cipher Puzzle:
Encrypt a short message using a simple substitution cipher (e.g., A=1, B=2) and provide a key for reference.
Include hints like “The alphabet has been shifted by 3 positions.”
Transposition Cipher Puzzle:
Rearrange the letters of a sentence using a transposition cipher and provide a clue on the rearrangement pattern.
Offer a hint like “Read every third letter in reverse.”
Caesar Cipher Puzzle:
Encrypt a famous quote using a Caesar cipher with a specific shift value.
Provide a hint that indicates the shift value, but not the plaintext.
Vigenère Cipher Puzzle:
Develop a Vigenère cipher puzzle and provide a keyword.
Challenge your peers to decipher the message with the given keyword.
Hints and Tips:
Think outside the box!
Incorporate basic puzzles like dot-to-dots, crossword puzzles or find-a-words into your puzzle to add layers of complexity.
Revisit past grok modules, How do they create puzzles?
A one time pad, also known as a “Vernam cipher” or “perfect cipher,” is an encryption technique that provides absolute security when used correctly. It works by using a random key that is as long as the message itself. This key is used only once, hence the name “one-time pad.”
Think to yourself… What benefits would having the key as long as the message have? What limitations could this pose?
Key characteristics?
Perfect Security: When used with a truly random and secret key, a one-time pad provides perfect security. This means that even with unlimited computational power, an attacker cannot determine the original message. This is because the key is as long as the message, making it statistically impossible to crack.
Key Length: The key must be as long as the message, which can be a limitation for practical use. Sharing long, random keys securely can be challenging.
Key Reusability: The key should never be reused for another message. Reusing a one-time pad key weakens the security because it allows patterns to emerge that attackers might exploit.
Key Security: Protecting the secrecy and integrity of the key is crucial. If the key is compromised, all security is lost.
Limited Practical Use: One-time pads are rarely used in modern communication due to their limitations, especially in securely distributing and managing long, random keys. Instead, modern encryption methods like public-key cryptography and symmetric-key algorithms are more practical for most purposes.
How does it work?
Key Generation: To encrypt a message using a one-time pad, you need a random key that is as long as the message. This key can be generated using truly random processes, such as a hardware random number generator, to ensure that it’s unpredictable and unique for each use.
Key Distribution: The key must be securely shared between the sender and the receiver. This is a significant challenge because if the key is compromised or intercepted, the security of the system is lost. In practice, this is one of the main limitations of one-time pads.
Encryption: To encrypt a message, the sender combines each character of the plaintext (the message) with the corresponding character in the key using modular addition. This process creates the ciphertext. The key is never reused for another message.
Decryption: To decrypt the message, the receiver uses the same one-time pad key and subtracts it from the ciphertext using modular subtraction to recover the original plaintext.
A one-time pad is a theoretically perfect encryption method that relies on using a random and secret key that is as long as the message. While it provides unbreakable security, it has practical limitations that make it less suitable for most everyday encryption needs.
Parting Question
If I wanted to set up a one-time-pad for use to swap secret messages with someone, how would I do this?
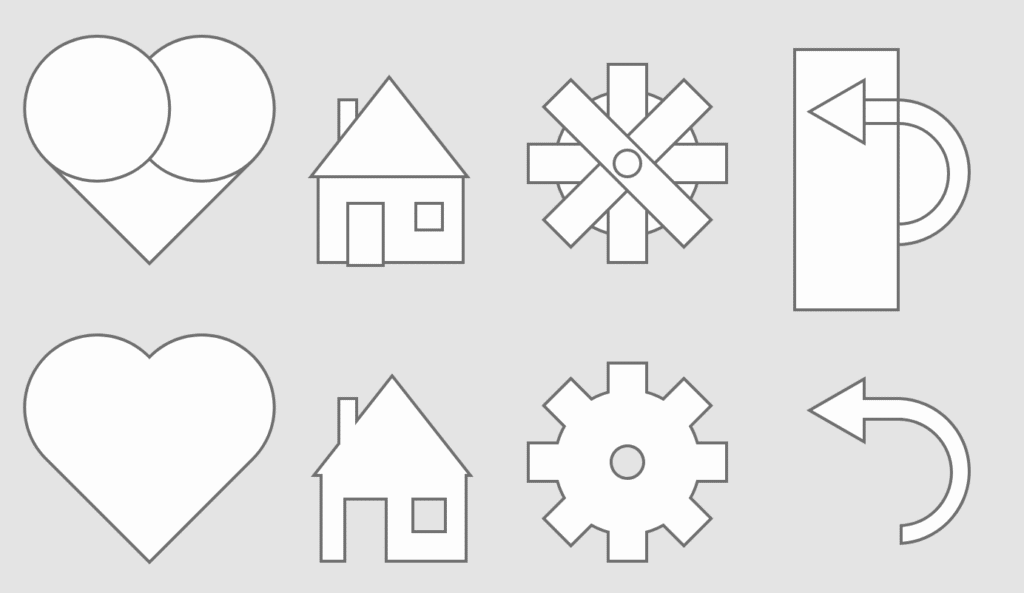
Sometimes we need more complicated shapes than circles, squares and polygons. The Pathfinder panel allows us to create new shapes by adding and subtracting them together.
To use the Pathfinder tool we need to select both objects by using the selection while holding shift.
The pathfinder tool has the following functions:
#1 Add: Combines the selected objects together
#2 Subtract: Slices the top object out of the bottom
#3 Intersect: Creates a new object from the overlapping area of both objects.
#4 Exclude Overlap: Cuts out the overlapping area of both objects.
Creating new shapes using the Pathfinder panel
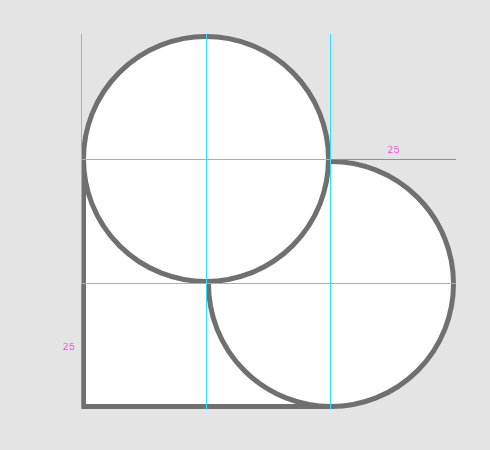
Below I will show you how to make a simple heart shape with the pathfinder tool.
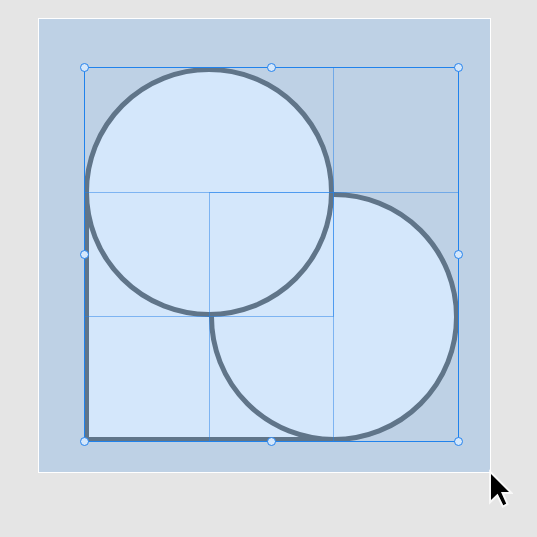
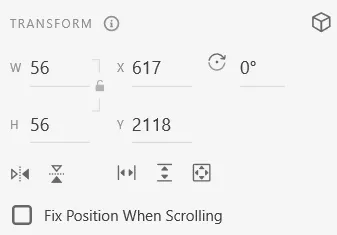
To start, create a square and two circles. Use the Transform panel on the right to ensure all three objects have the same height and width.
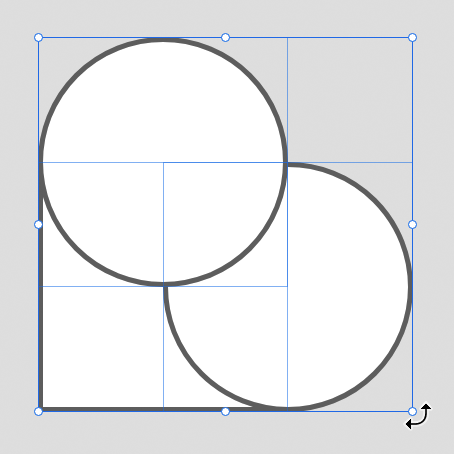
Drag the circles over two edges of the square. Use the guides to help you line everything up perfectly.
Drag select all 3 objects.
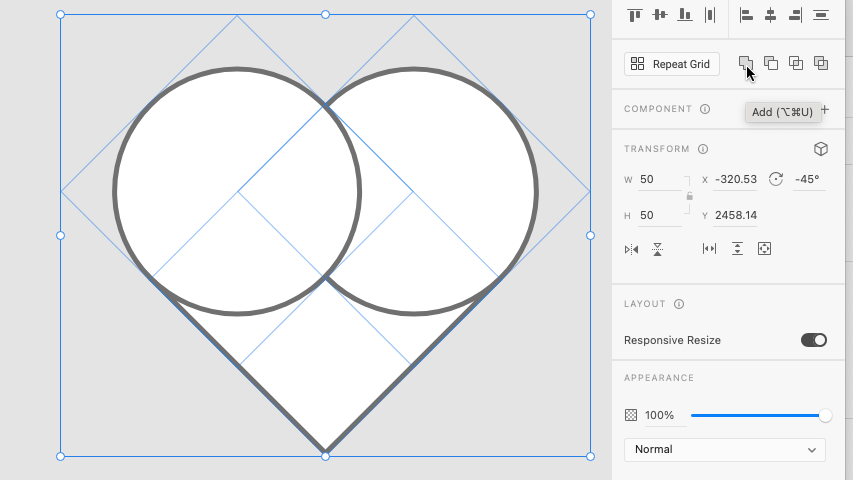
Hover your mouse just outside of one of the selection box’s corners to make the rotation tool visible. Rotate your heart so it is upright.
Press add in the Pathfinder panel.
Your heart should now be complete. Try to think of other ways you can use the Pathfinder panel to create new shapes.
Please focus on your apps minimum viable product first
After we have created our apps basic functionality we can add and change elements to refine it. This polish can be the difference between our app appearing to be created by an amateur or professional.
Visual Constancy
Do these two characters look like they belong together? Probably not! That’s because they have very different art styles, which can make your work look messy and confusing.
When styles don’t match, it’s harder for people to understand what’s going on, and it doesn’t look as good. Try to keep things looking similar. For example, if you’re using photos, keep using photos, or if you start with 3D characters, don’t mix in hand-drawn ones.
Good design looks better and is easier to use when things match.
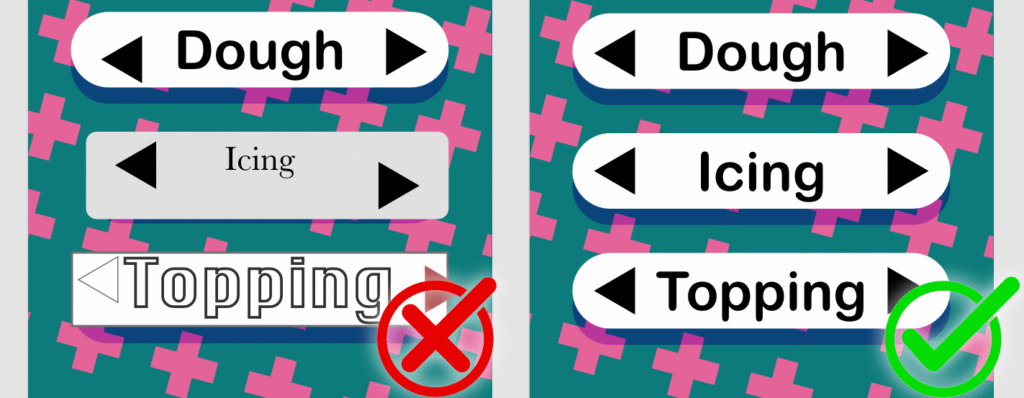
In the first example, the words are different sizes, the fonts don’t match, and the buttons are all shaped differently. This makes it look messy and harder to follow. In the second example, everything is the same size, the fonts match, and the buttons all look the same. When things are consistent like this, the design looks neater and is easier to understand.
Colours
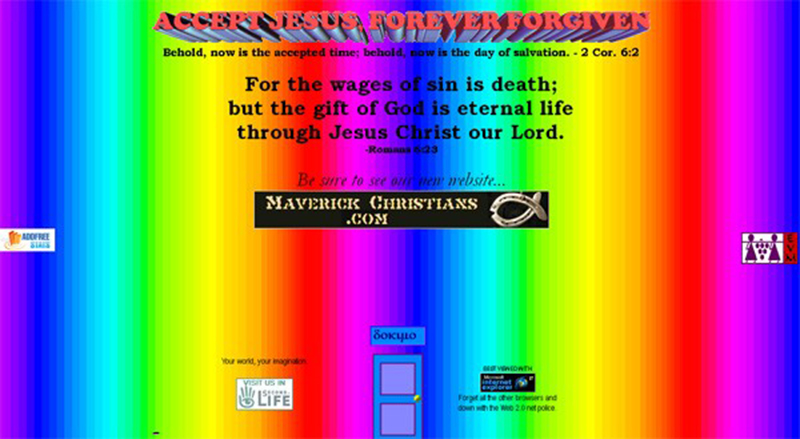
In the example above, there are too many bright colours fighting for attention, which makes it hard to know where to look and can even give people a headache.
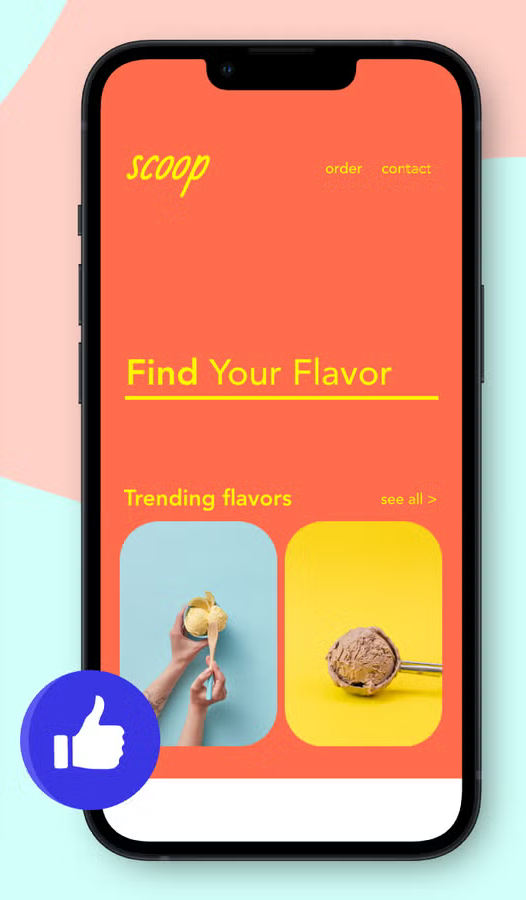
When you use fewer colours that work well together, your design feels calm, organized, and more professional. It also makes important things stand out without overwhelming the viewer. Remember that good design helps people find information quickly, and a limited colour palette makes that easier.
Animation
A splash screen is the fist screen users see before using an app, even before the home screen. This type of screen is used to capture the users attention and to get them excited to use the app.
If we want to add a little bit of style to our app we can include some basic animation.
Bellow, will I show you how to make a simple splash screen
Here we are going to add a simple rotation animation to the doughnut. This kind of animation works best of round elements that don’t have parts sticking out. This object could be a wheel, ripples in a cup of coffee or in this case, a doughnut.
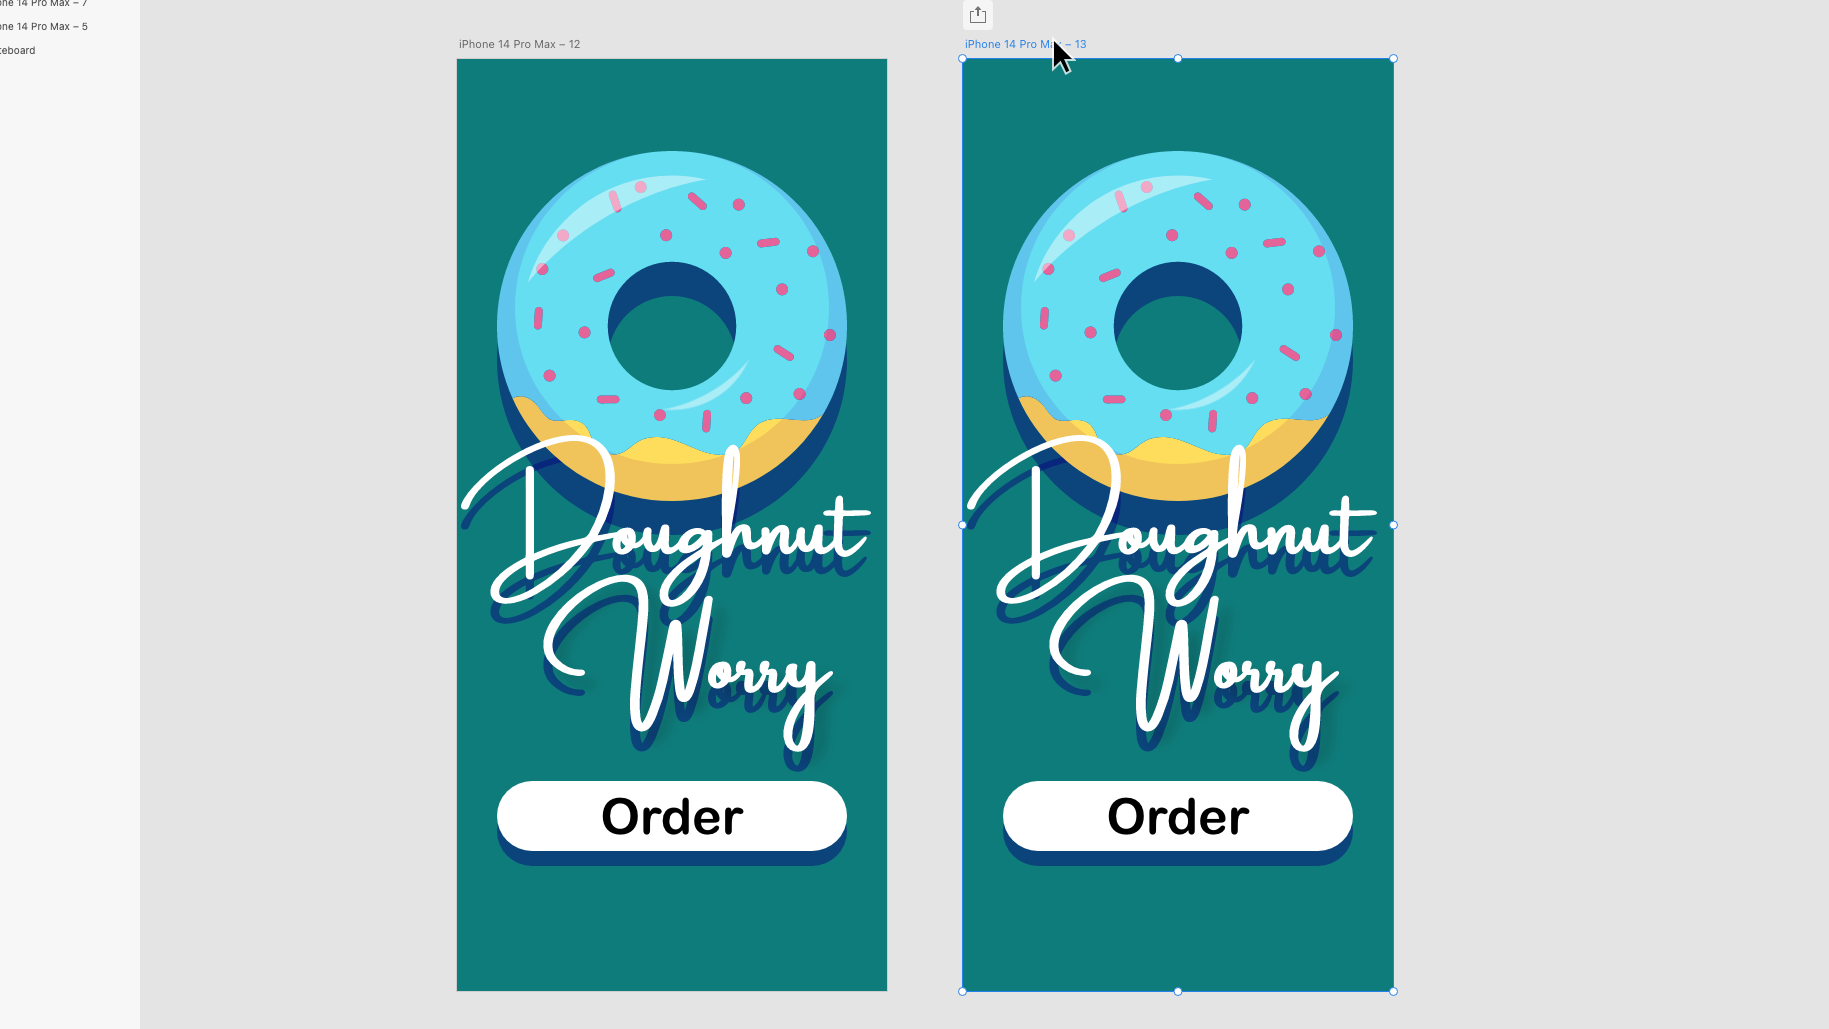
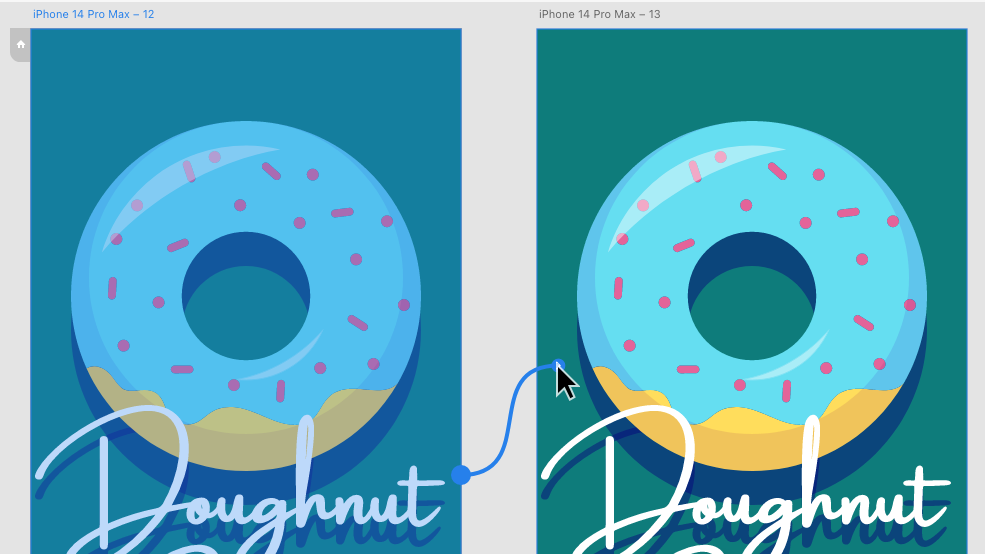
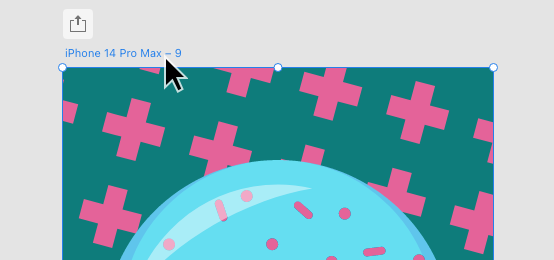
Start by designing a splash screen and making a copy of it by grabbing the artboard title (This is usually called iPhone 14 Pro Max”) and dragging off a new one while holding alt/option.
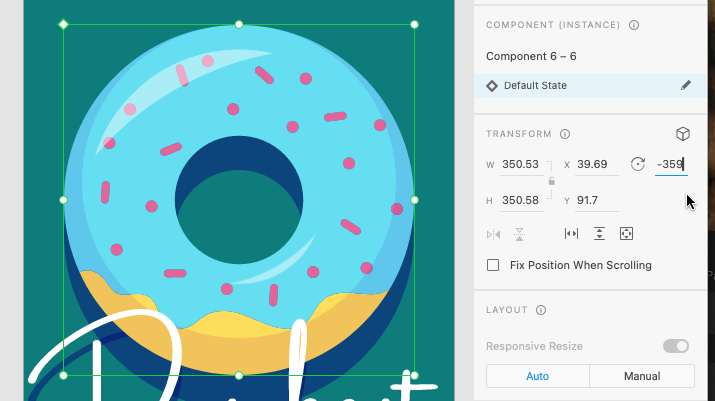
On the second screen while in the Design menu, change the rotation of our round element to 359 degrees. While it may not appear a lot has changed, this is an important step in making our object spin.
Head to the Prototype menu.
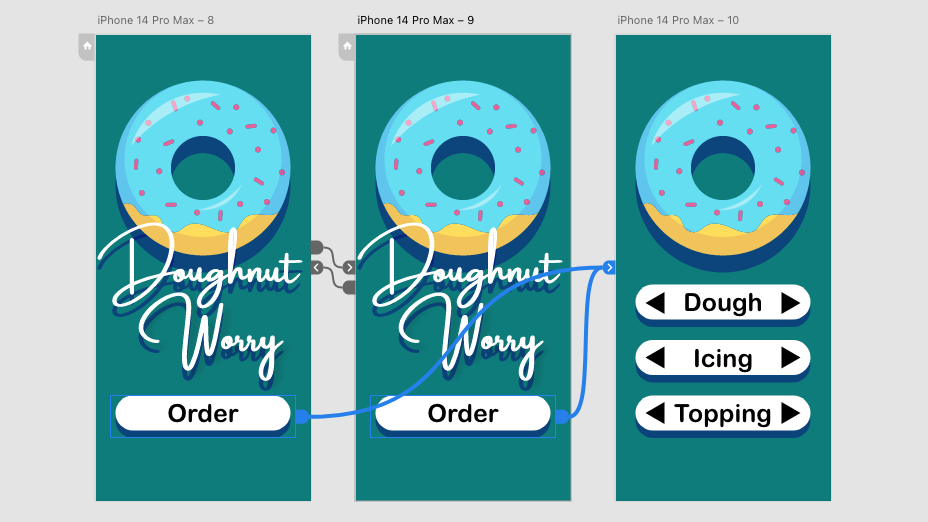
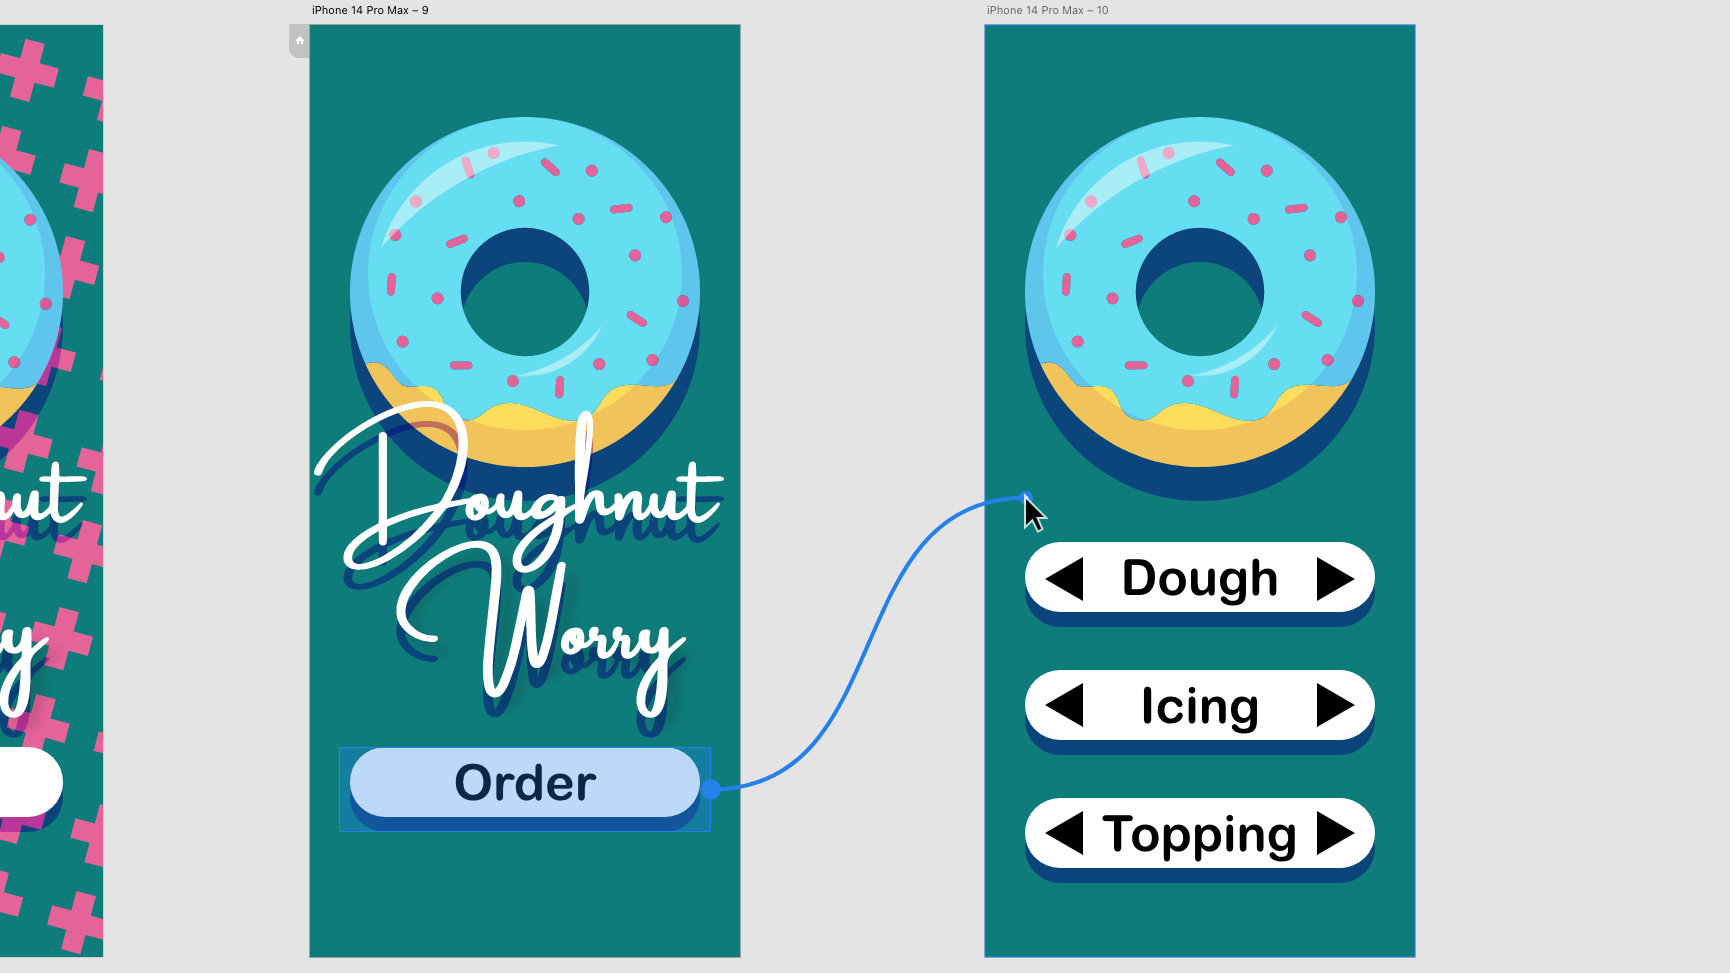
In the Prototype menu, select the title of the first splash screen and drag a wire over to the second screen.
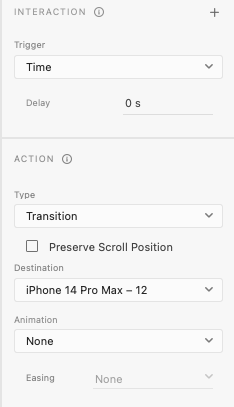
After connecting the wire head over to the Interaction panel on the right.
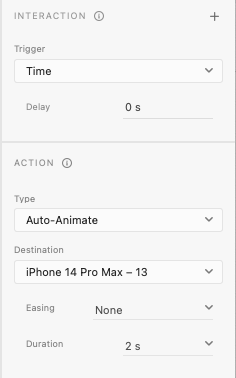
Change the trigger to time with a delay of zero seconds, this makes the animation begin right away.
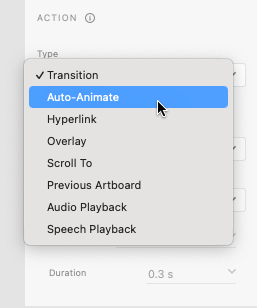
in the Action panel, change the animation type to “Auto-Animate”, the Easing to “None”, and the Duration to “2 seconds”. This will make the object rotate at an even speed. you might want to experiment with these settings later.
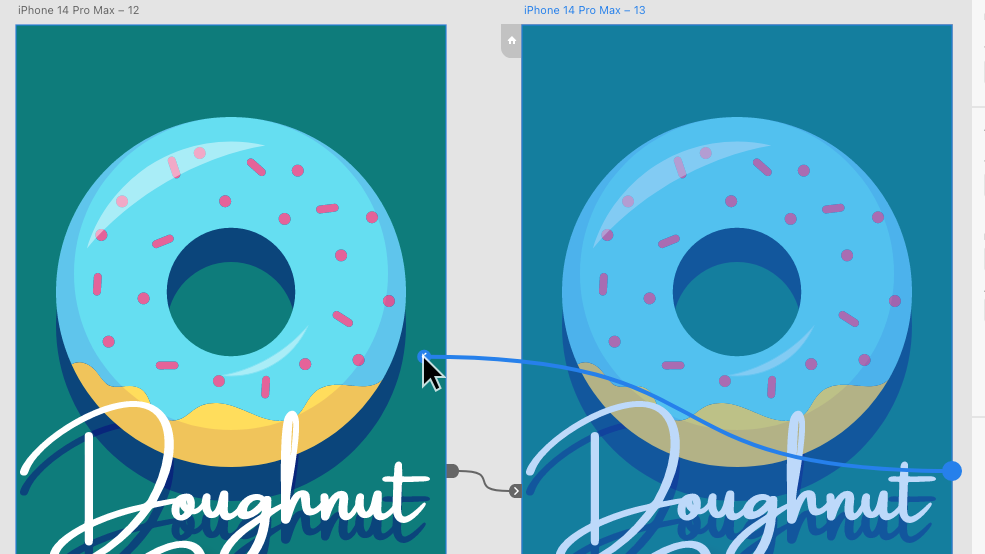
Now select the title of the second splash screen artboard and drag a wire over to the first.
Head back to the Interaction and Action panels.
Here, change the animation type to “transition”. While you are here, ensure there is no delay and animation is set to “None”.
You can text if you have successfully created your splash screen animation by pressing play in the top right corner. If successful, the animation should loop forever.
Finally, we need to connect the splash screen to the home screen. Be sure to connect the buttons on both splash screens as show above to ensure it is always accessible.
This is just one of many ways we can use animation to add a premium feeling to our app. Experiment with the skills you have learnt to see if you can create new types of animations.
By now you should be ready to create additional screens for your app. These screens are called artboards.
The best way to do this is by duplicating the existing art board. This ensures the new artboard is the same size, this is important because phone screens cannot change size.
Duplicating Artboards
To duplicate the artboard, we need to use the selection tool to select the title of the artboard (This is probably called something like “iPhone 14 Pro Max”). After selecting, we can duplicate the window two ways; by pressing cmd+d or by dragging the artboard by the title while holding alt/option.
After duplicating the artboard we can delete the unneeded elements and continue working.
Creating Buttons
Before we create our transitions we need a button to press to activate it. These buttons can a shape, image, text or be any type of object.
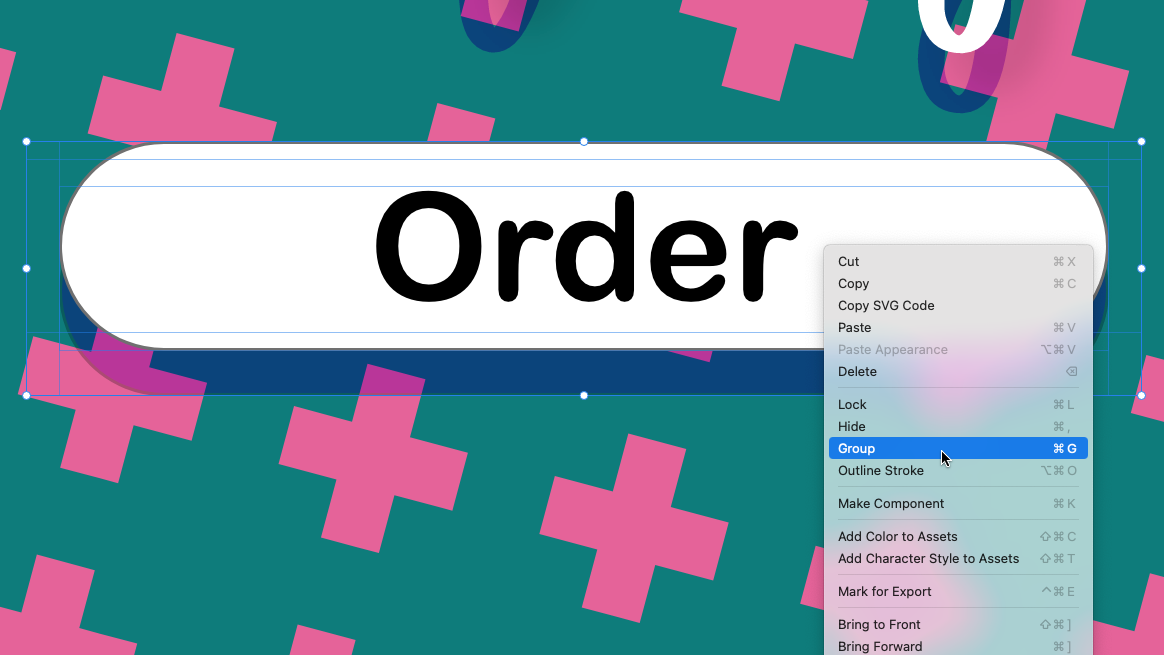
If our button is made of of multiple objects we can group them together using the select tool to select multiple objects while holding shift. We can then right-click the selection and choose group, or press cmd+g. The group of objects selected will now be treated as one object.
The Prototype Menu
Up until this point we have been using the Design menu to define the visual aesthetic of our app, we now need to move to the Protoype menu in the top left corner to create our transitions.
To create a transition, use the select tool to select your button. You will notice a blue arrow on the right side of the object.
You can now drag this arrow to the artboard you want your button to link to and unclick. after releasing you will notice a connection between the button and artboard – these connections are called wires.
You can now text your button by clicking the play button in the top right corner of the screen. You may need to click the artboard that has your button in it first to start in the right place.
Types of Transitions
With your now linked button selected you might notice the action menu on the right side of the screen. here you can change the type of transition that will happen when the button is pressed.
Maybe you want everything to move into place with Auto-Animate or the new screen to fade in over the old one with Overlay.
Experiment with the different types to see what effects can be done!
Now that we have gotten a general idea of our layout with our wireframe, it is time to add some visuals to our app.
Colour Palette
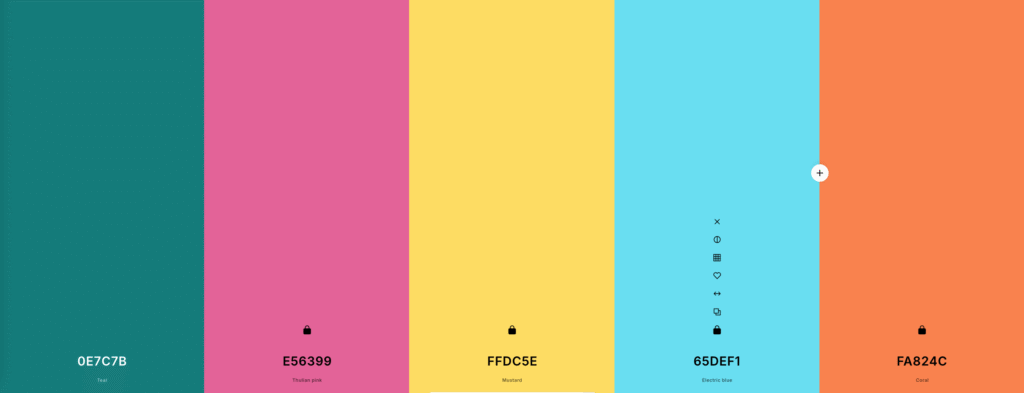
nearly every major app has a distinct colour palette: Youtube is red, white, and black while Snapchat is yellow, blue and white. to strengthen the appearance of our app we can also choose a colour palette for our apps.
As a quick way to generate a colour palette I recommend using Coolors.co. Here we can generate colour palettes by pressing spacebar until we get one we like.
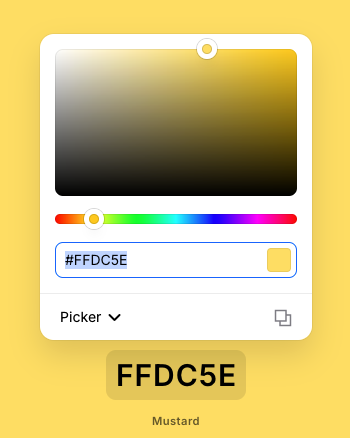
Once we are happy with the colour palette, we can copy the individual colours by clicking the codes at the bottom and using cmd+c. This is called a Hexcode which turns the exact colour into numbers and letters.
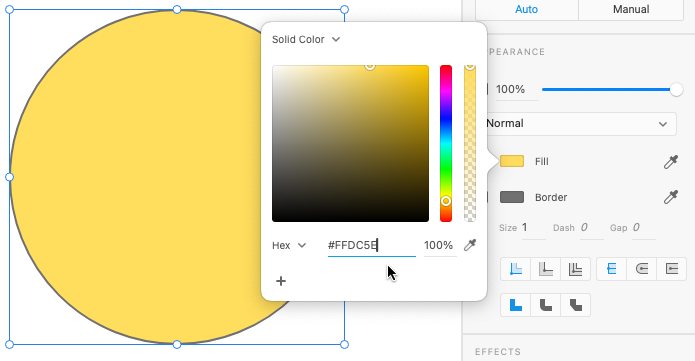
We can now make an object in out Adobe Xd document this colour by selecting it, clicking the colour block next to “fill” or “border” and pressing cmd+v.
Inserting Images
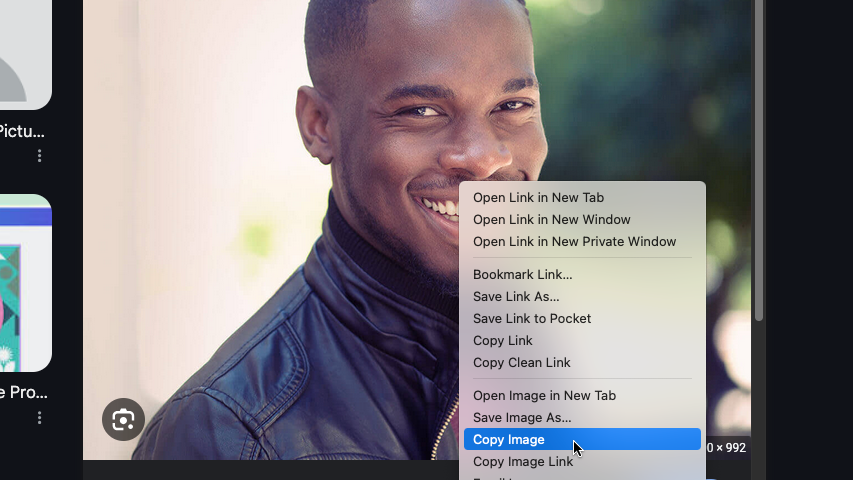
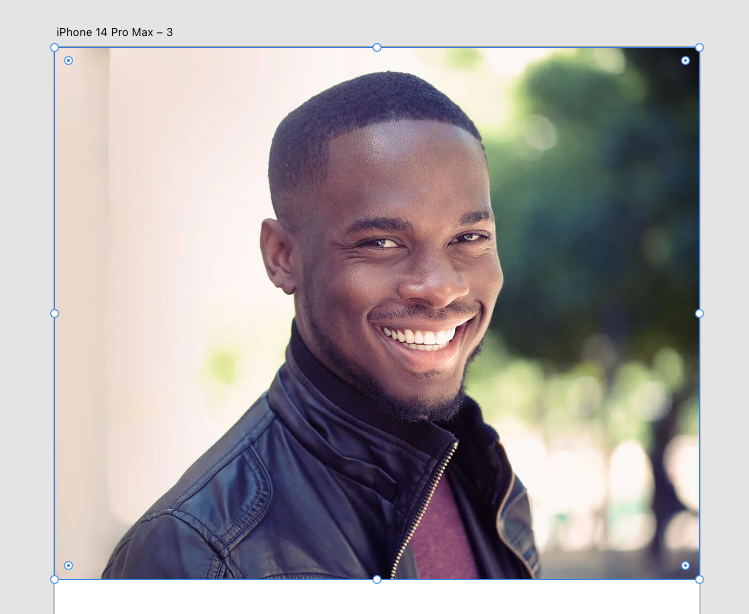
Rather than creating every image in our app from scratch, we can use online images from places such as Google Images. When we find and image we like we can copy the image by right-clicking and selecting Copy Image.
We can then insert the image into Adobe Xd with cmd+v.
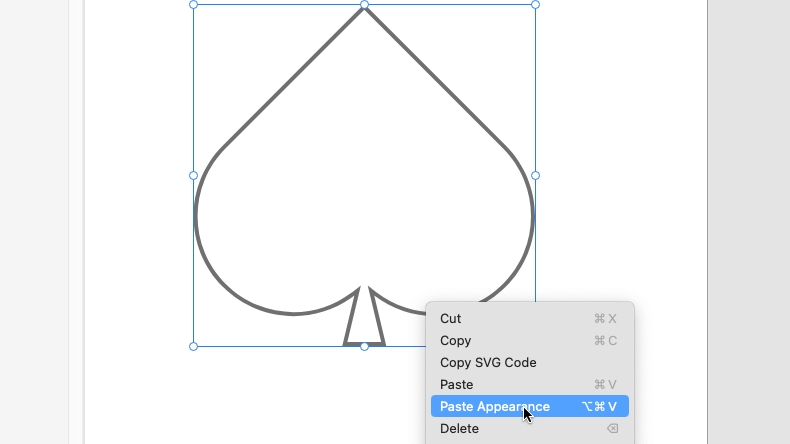
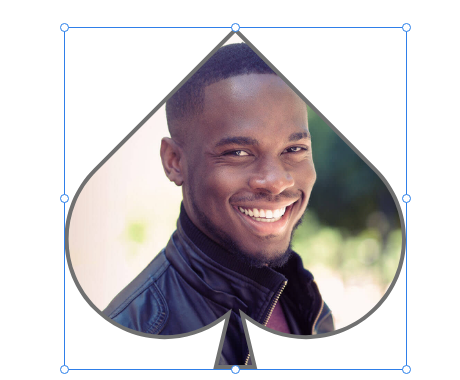
We can also use a shape to mask our image by right-clicking and selecting Paste Appearance.
We can also change the appearance of other elements in out app using the following panels:
Appearance Panel
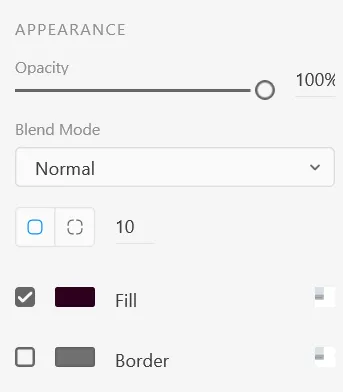
Here you can change the fill colour, border colour and roundness of object corners.
Transform Panel
Allows the height, width, angle and position of the objects to be changed.
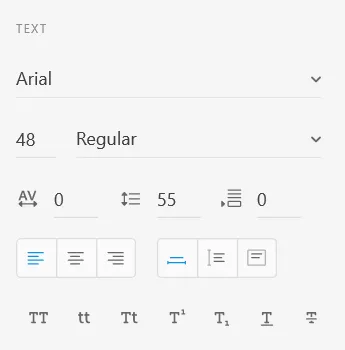
Text Panel
Here you can modify font type, size, text alignment, and other text options.
Sometimes, due to the implementation of new features we need to go back and update our programming due to incompatibility of these functions. The collectable pick-up function we created in an earlier lesson is one of these instances; respawning makes the player character no longer able to pick up collectable items.
This happens when the player character despawns; the game doesn’t move the existing character back to the respawn point—it creates a clone of the character. As a result, any data stored on the original character, such as the “keys collected” counter, is lost and no longer tracked by the newly spawned character.
To fix this, we need to move the Keys Collected counter somewhere else. Drag select, cut(cmd+X) and Paste(cmd+V) this node chain from BP_ThirdPersonCharacter to BP_ThirdPersonGameMode. You will need to recreate the Variables and Event Dispatcher on the left in BP_ThirdPersonGameMode.
We will now need to Update BP_[Item]Collectable as above. Note that the Key Pick Up node needs to be recreated now referencing BP_ThirdPersonGameMode.
BP_LockedDoor will also need to be updated with the red highlighted nodes. Please note that you will need to recreate the Keys Collected variable as the existing one is attached to BP_ThirdPersonCharacter, not BP_ThirdPersonGameMode.
Finally we need to update the highlighted red nodes in this section of the WBP_HUD widget. As before, please replace the nodes even if they have the same name, as they are referencing BP_ThirdPersonCharacter, not BP_ThirdPersonGameMode. Compile and test.
Clean-up
Return to BP_ThirdPersonCharacter, go to Edit > Delete Unused Variables. This will remove any now unused variables.
Watch the video below to recap how a simple Ceasar Cipher works. Practice manually ciphering messages with a partner to reinforce these ideas.
Vignére Cipher Refresh
Watch the video below to recap how to Encrypt and Decrypt using a Vignére Cipher. Practice manually ciphering messages with a partner to reinforce these ideas.
Last lesson we created a “lose” state for when our player character is destroyed, which returns them safely to the game starting point. In this tutorial, we will add methods for the player to “win” or “lose”.
Losing
Sometimes our characters meet an unfortunate fate. Maybe they have stepped onto spikes or lava, immediately causing their doom. Dangerous terrain like this is called a “killzone”
As we have set up our player character to immediately respawn in a safe location whenever they are destroyed.
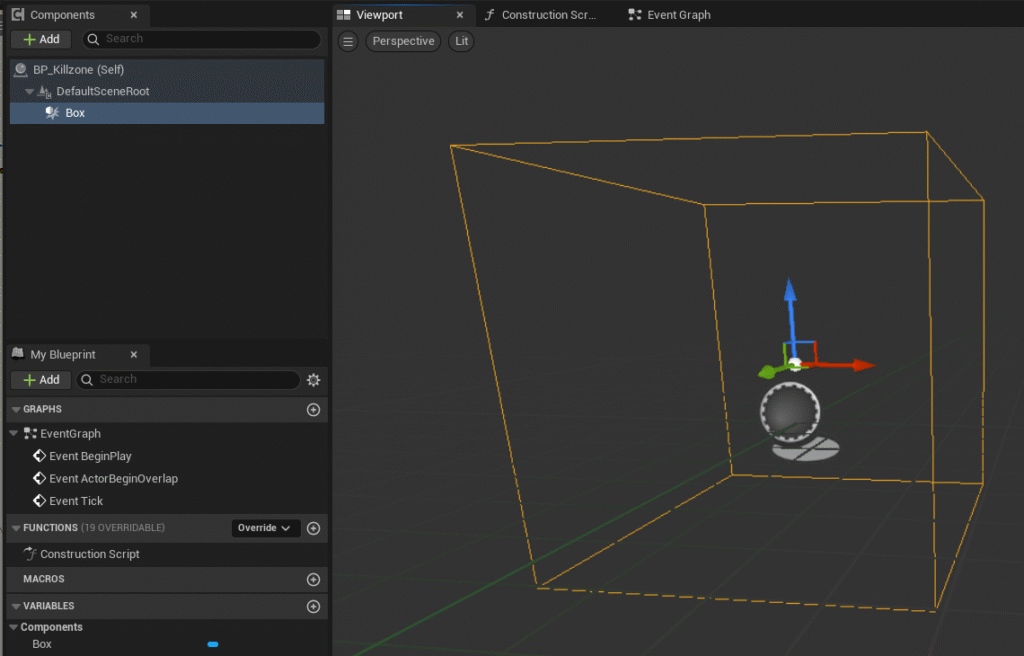
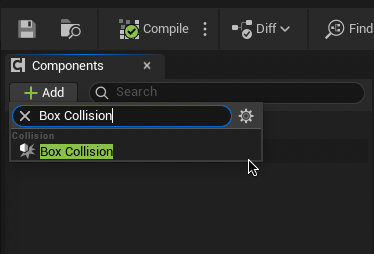
Go to the Content Drawer and go to Add > Blueprint Class > Actor. Name this new Blueprint “BP_Killzone”, double click to enter. Once in the blueprint add a Box Collision in the components panel on the left. Head to the Event Graph.
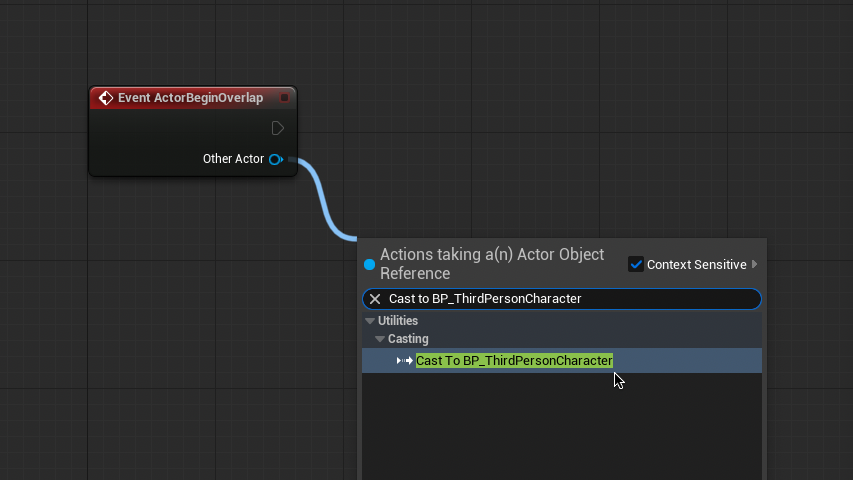
From “Event ActorBeginOverlap” Cast to BP_ThirdPersonCharacter.
Now from “As BP Third Person Character” Drag and release to select “Destroy Actor”
Compile and test. Your character should trigger the respawn function we created last lesson when coming into contact with the killzone. Feel free to return to the viewport and add a static mesh to the killzone, such as spikes or lava.
While the killzone is now technically functional, it doesn’t really have any impact. Let’s hold a the character for a moment to signify the impact.
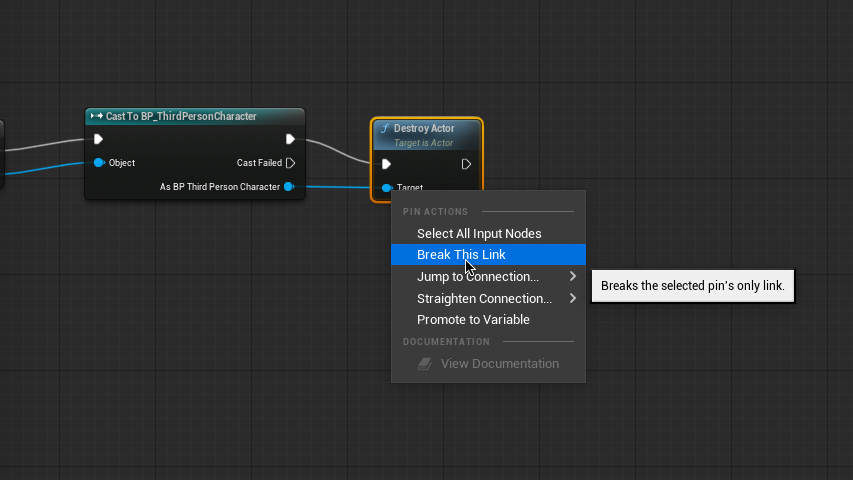
Right click both the links to the Destroy actor node and select “Break this link”.
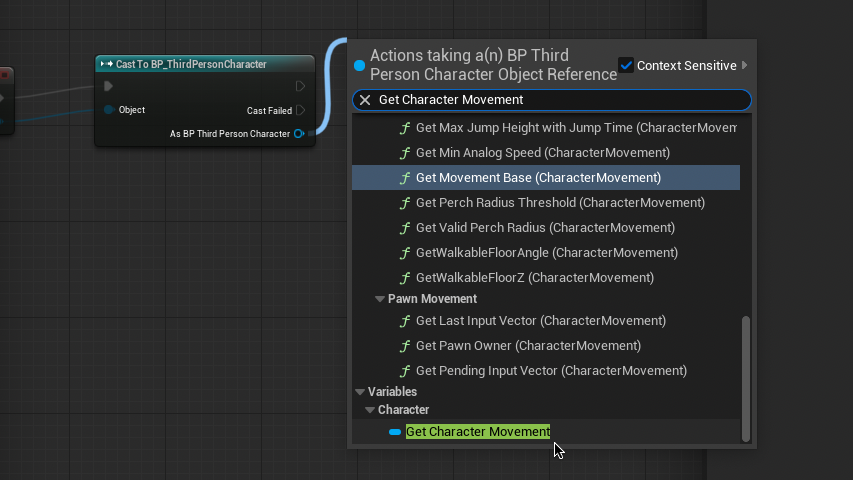
From “As BP Third Person Character” drag and release twice to select “Get Character movement and “Get Mesh”. These are the assets we will be freezing.
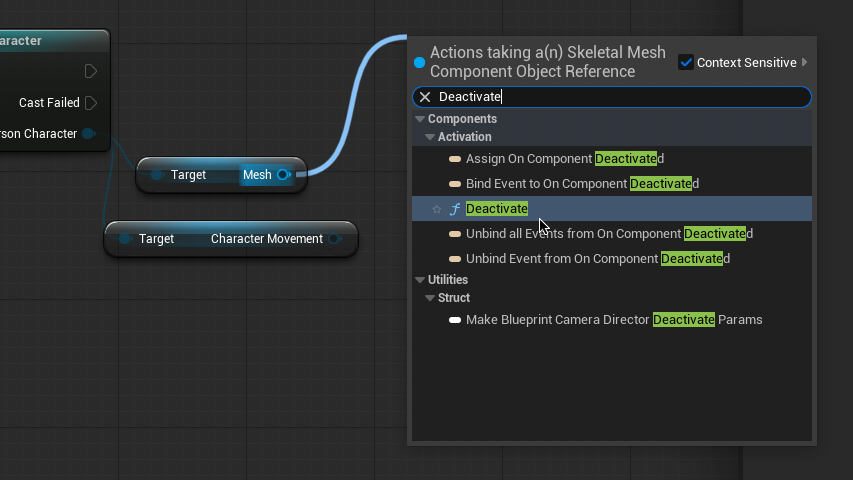
From one of these new nodes, drag and release to select “Deactivate”. Connect both of these nodes to the target. Connect the new Deactivate node to the Cast To BP_ThirdPersonCharacter node.
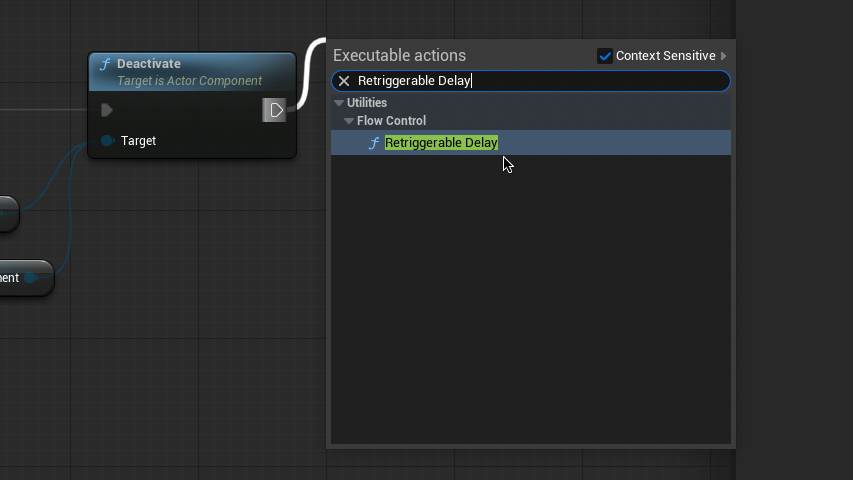
From the Deactivate node drag and release to select “Retriggerable Node”.
Reconnect the Destroy Actor node to the end of the chain and to “As BP Third Person Character”. Your event Graph should look like this. Now when the player character hits the killzone there will be a noticeable delay before being returned to the respawn point.
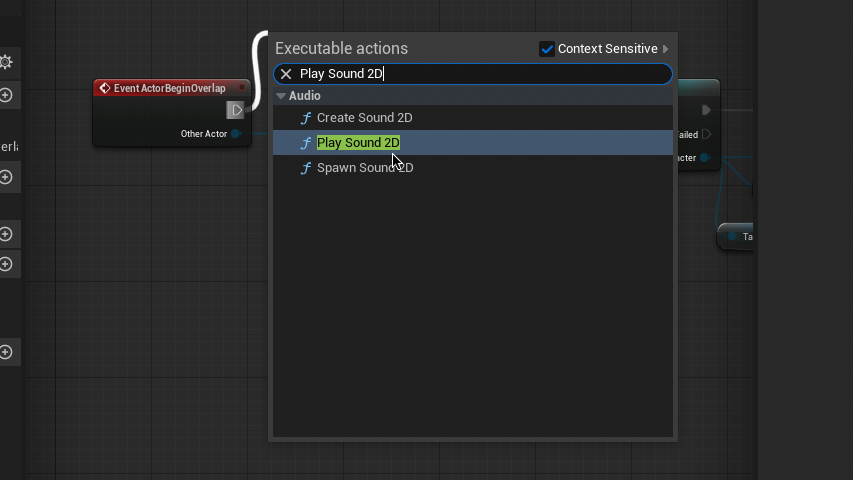
This is a good start, but we can improve the impact by adding a sound effect. Right-click the top output of the Event ActorBeginOverlap node and select “Break This Link”. Drag and release from this output to select “Play Sound 2D”, which will create a sound effect centered on the player. Connect the output of this node to the input of “Cast To BP_ThirdPersonCharacter”.
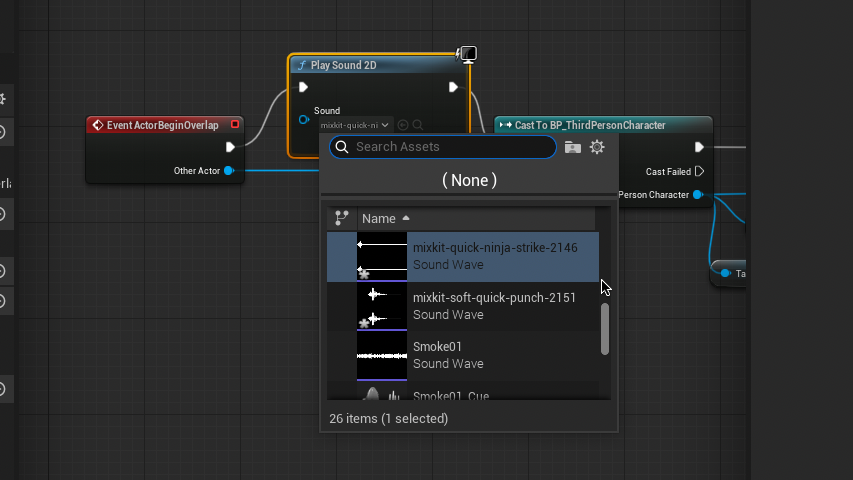
In the Sound input of the new node select your sound effect. You may want to find a sound online and import it to the game by going to Content Drawer > Add > Import to /Game…
We can add additional effects to increase the impact of our player character taking damage, such as shaking the screen, flashing red or black over the viewport, or adding particle effects such as sparks or explosions. Do some independent research to come up with your own to find your own way of communicating losing to the player.
Winning
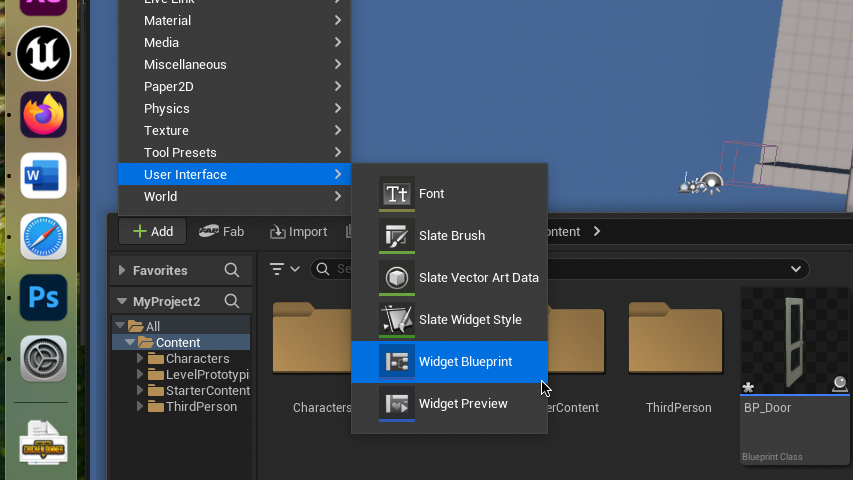
To start, we need to make a victory screen to communicate to the player that they have won the game. Got to the Content Drawer and select Add > User Interface> Widget Blueprint. Name this new Blueprint “WBP_Victory”. Double Click to enter the Widget Designer.
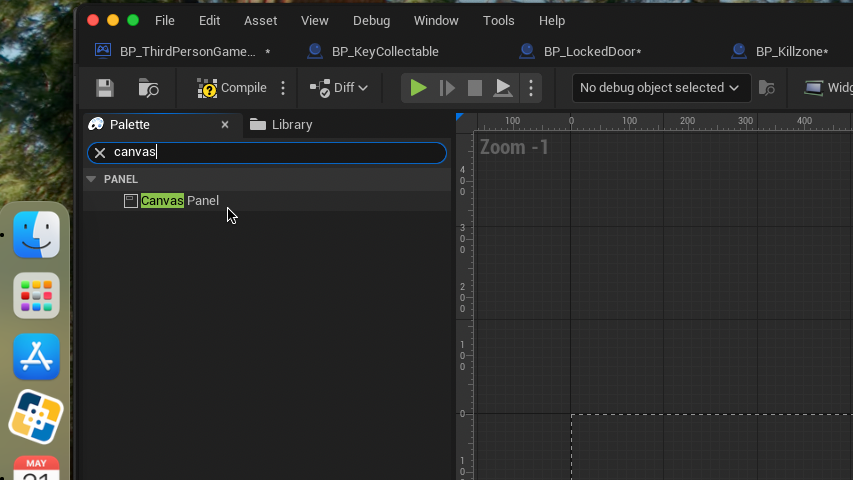
In the top-left Palette Panel, search and drag “Canvas Panel” into the designer.
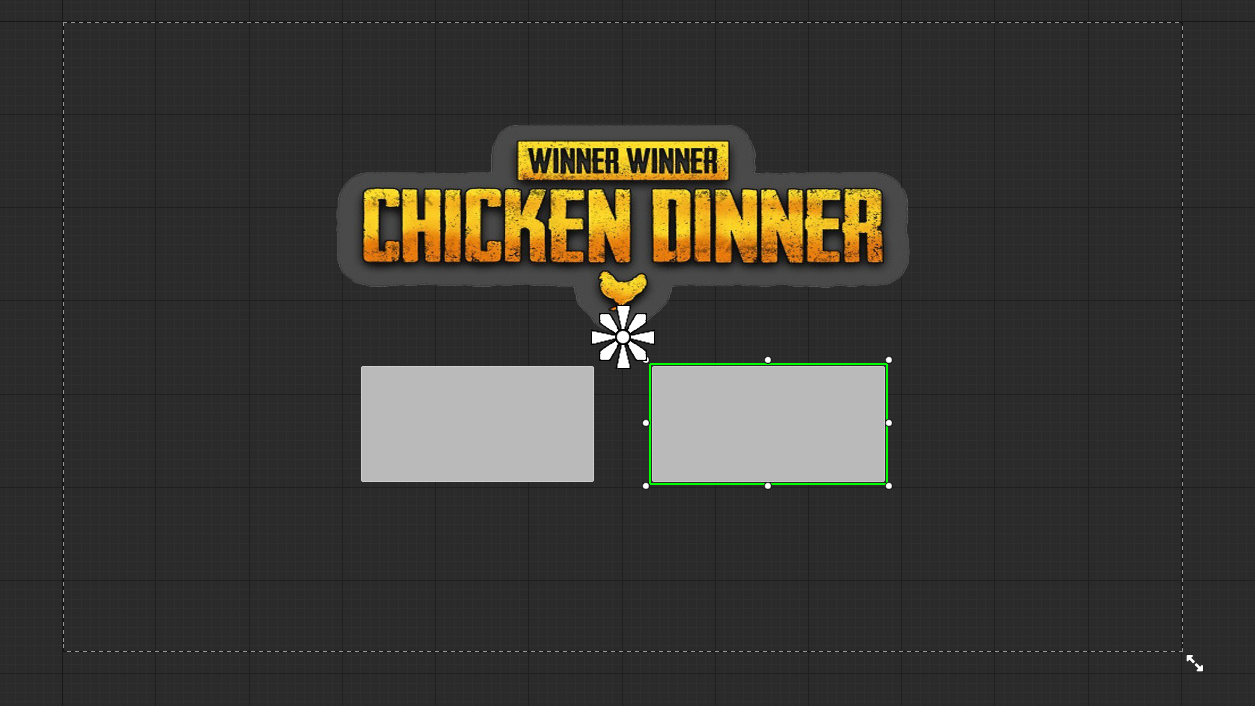
Spend a little bit of time designing a victory message to the player. You can add images or text the game way you did in Communicating Collectables.
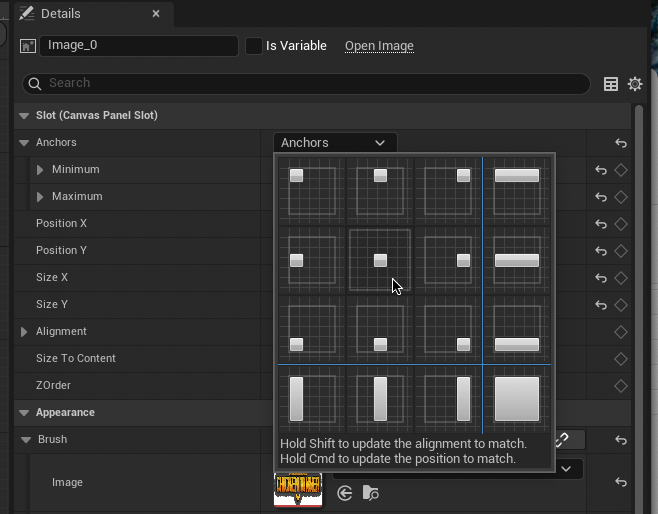
Be sure to Anchor this and all future objects to center in the right Details Panel. This ensures the elements will always aligned to the center of the screen, regardless of screen size and aspect ratio.
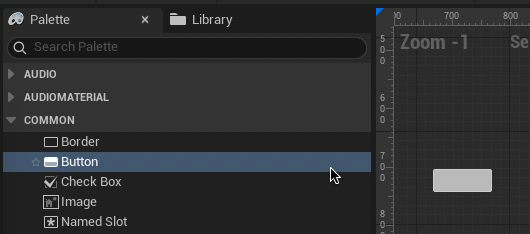
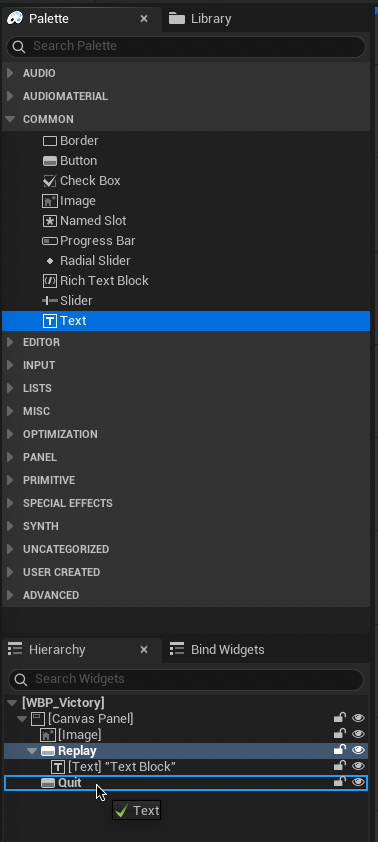
Back in the Palette Panel, drag two buttons into the canvas. Name these buttons “Replay” and “Quit”.
Resize and arrange these buttons however your feel.
From the left Palette Panel, Drag a text box into each button. In the right Details Panel change the names of these text boxes to “RetryText” and “QuitText”. Change the text of these boxes to their respective purposes under Content > Text.
Now let’s add some controls to our buttons. Select the Retry button and scroll down to the bottom of the right Details Panel. Under “Events” select “On Clicked”, this will take you to the Event Graph.
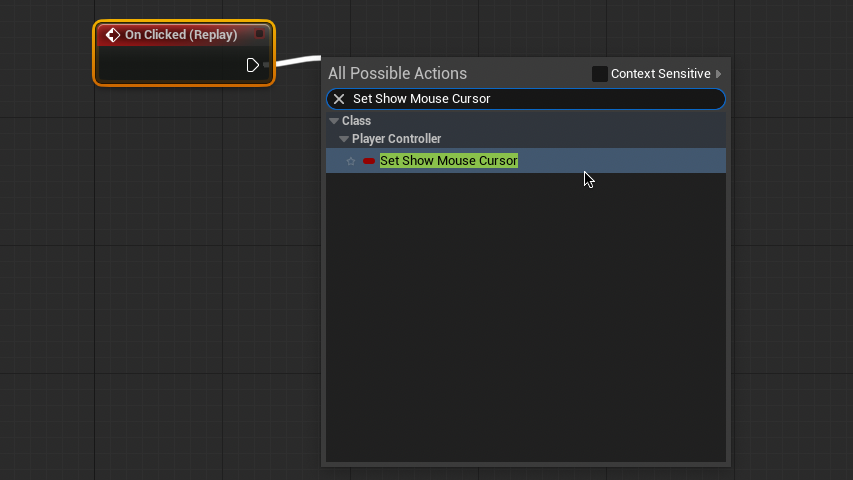
From the On Clicked Event, Drag and Release to type and select “Set Show Mouse Cursor” (you will need to uncheck “Context Sensitive” to find this) and ensure “Show Mouse Cursor” is unticked. Drag and release from the target input and select “Get Player Controller”
From the Set node output Drag and Release to select “Execute Console Command”. Fill in the Command text box with “restartlevel”. Your Event Graph should look like this.
Return to the Widget Designer and select the Quit button > On Clicked Event.
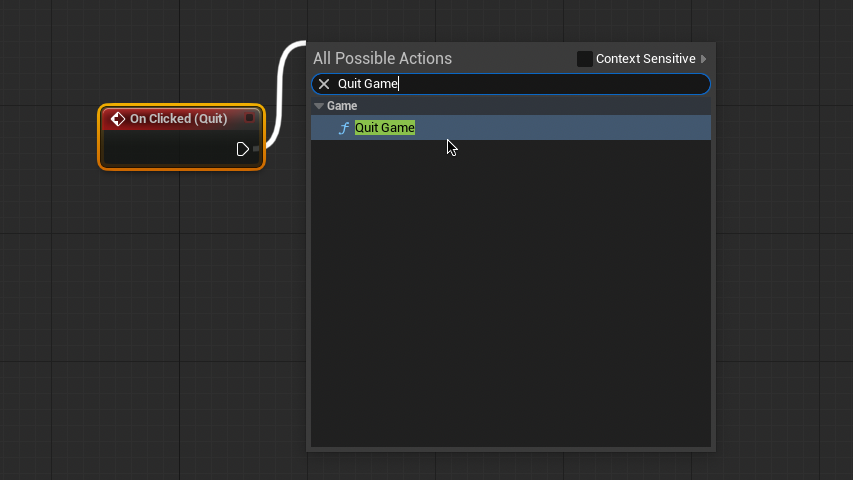
From “On Clicked (Quit)” drag and release to select “Quit Game”. Click compile.
We have now completed our victory screen widget. We now need to create a Goalzone to trigger this screen.
Return to the Content Drawer and Click Add > Blueprint Class > Actor. Name this blueprint “BP_GoalZone” and double-click to enter.
As we did for BP_Killzone add a Box Collision. Go to the Event Graph.
From “Event ActorBeginOverlap” Cast to BP_ThirdPersonCharacter.
From the new node, drag and release to select “Create Widget”. Set the Widget Class to “WBP_Victory”. Drag and release from the Return Value to select “Add to Viewport”.
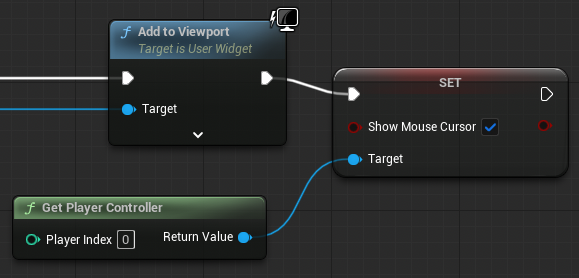
From the Add to Viewport node, drag and release to select “Set Show Mouse Cursor” (as before, you will need to uncheck “Context Sensitive” to find this) and ensure “Show Mouse Cursor” is ticked. Drag and release from the Target input to select “Get Player Controller”.
Finally, Drag from the Set node to select “Set Game Paused”. ensure “Paused” is ticked. Your event Graph should look like this.
Compile and test. Your victory screen should now appear when the player character collides with it.
Think other of ways you could make the victory screen more exciting. Maybe, you could add sounds or visual other effects to improve the players sense of achievement.
The Vigenère cipher is a method of encrypting alphabetic text by using a simple form of polyalphabetic substitution. Essentially it is a series of interwoven caesar ciphers, however it uses a word as a key instead of a number or series of numbers.
Think to yourself… What benefits could this have? What would it reduce?
Whilst a Vigenére Cipher is more difficult to break with brute force, it is more effective than a simple Ceasar Cipher. However, it can be broken if the length of the keyword is guessed.
How does it work?
The Vignére Cipher uses a Vignére square to encrypt and decrypt text.
Let’s give it a go…
Joe’s favourite type of pizza is? CSTWZG
Key: CYBER
Race for the Code
Aims:
Be the first team to find the secret code and tell it to the teacher to win.
Rules:
Respect other classrooms by not disrupting others classes in the area.